Welcome to our guide on My Neighbor Alice (or just MNA). My Neighbor Alice is a free-to-play and play-to-earn cryptocurrency game that gaining popularity in the cryptocurrency space.
Often the word “crypto” or “web3” refers to cryptocurrencies in relation to currencies, web experiences, and games. So if you see “crypto this” or “crypto that”, we’re referring to cryptocurrency version of those things.
Among the games in the crypto gaming industry, we’ve found that MNA provided one of the best crypto gaming experiences because it focuses more on art and community. Something many games seem to lack. We’ve found this greatly enhances the gaming experience. In addition, they have great Airdrops to earn crypto.
My Neighbor Alice Player Guide
In this article, we’re going over all the new player questions and challenges with the game to help provide a better experience for everyone.
Account Setup
Before you begin you need to install and set up a cryptocurrency wallet such as Metamask. For a guide on how to install and use Metamask, see Metamask’s documentation.
For MNA, Metamask will act as your account. When you create a password to unlock your wallet, it acts as your account. Basically, access to Metamask means you have access to your MNA account.
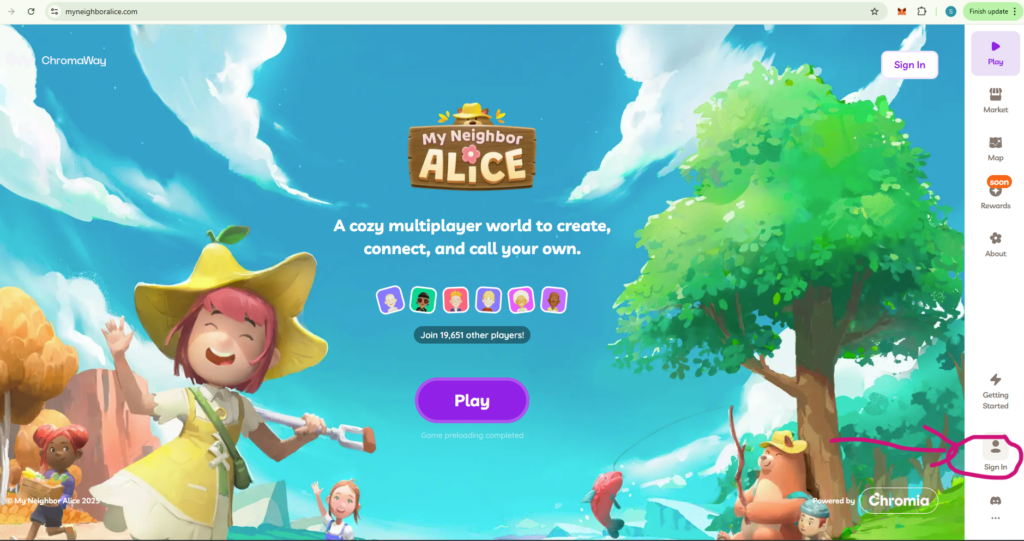
Once you have your wallet, open My Neighbor Alice website at https://myneighboralice.com/.
The first step is to connect your wallet to the game. You can do that by clicking the Sign In button on the right hand side of their website.
Authenticating your wallet for the first time may require a few steps. You’ll need to allow the website to connect to use your wallet, then you’ll need to prove to the site that control your wallet by signing a message from the website.
First, the game will be asking you to connect your wallet account. We are using Metamask in this guide, but there are others you can use.
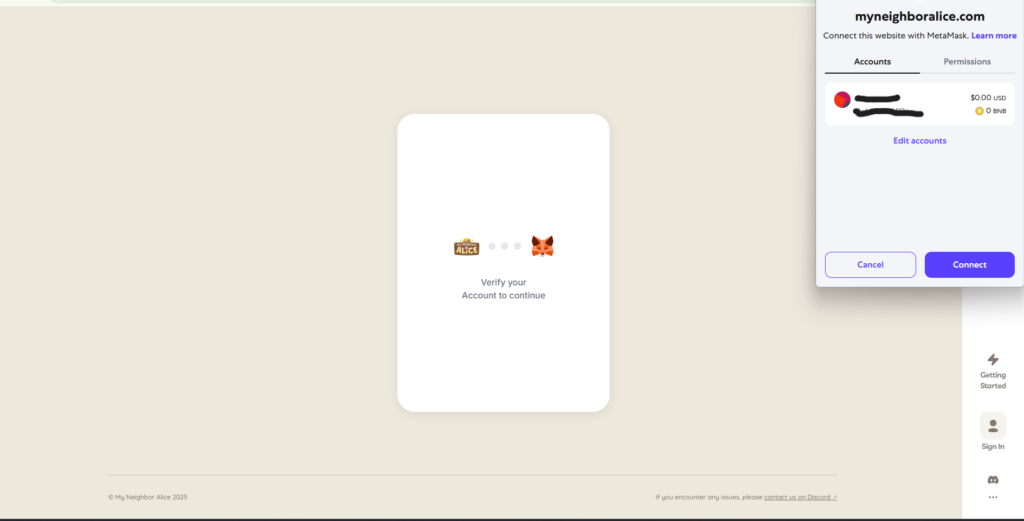
Next, the website will ask you to sign a message from your wallet. Confirm signing the message to authenticate your wallet to the website. You may need to confirm a few times.
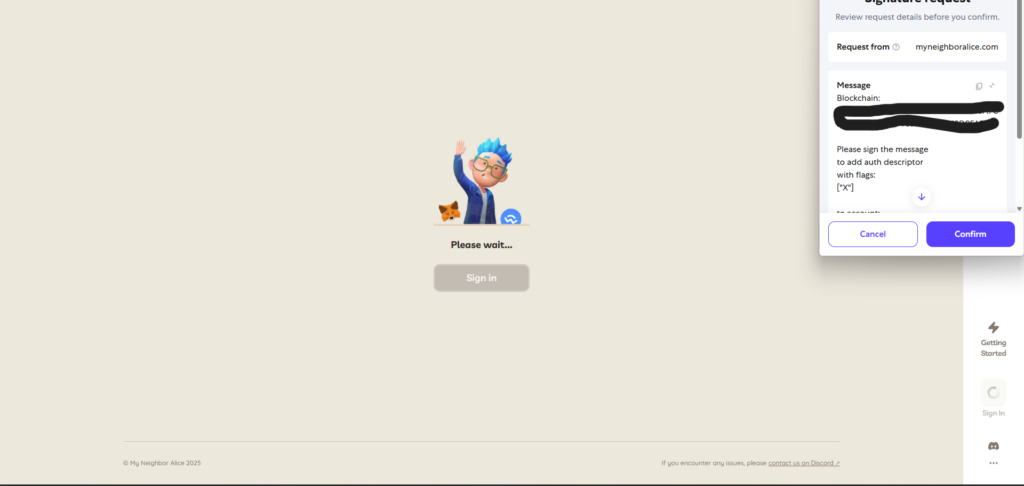
Once signed, the website will know who you are by your wallet address.
Getting Free Trial Land
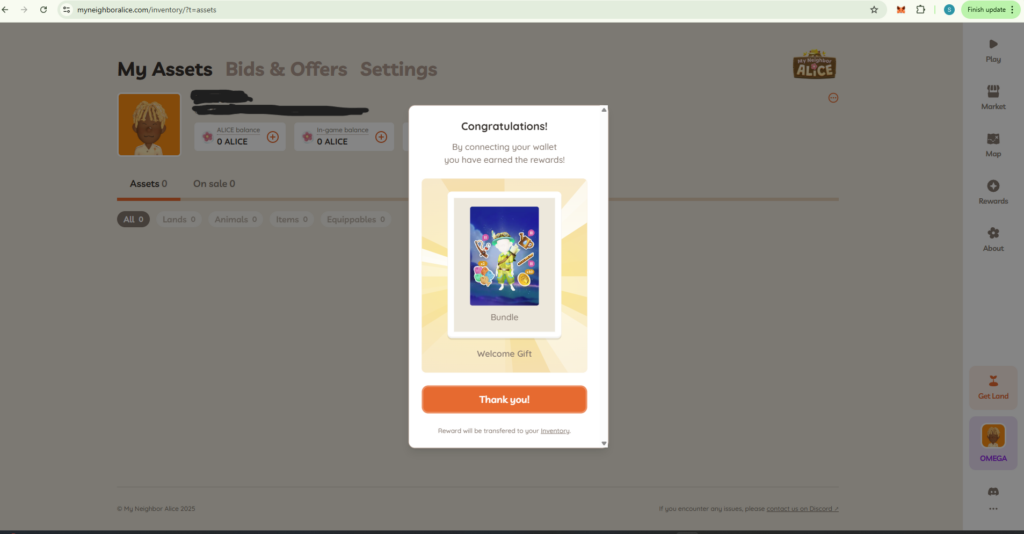
As of writing, you will be given a gift and some free land to rent. The rented free land is provided so you can participate in a meaningful way. Unless you already bought some, without your free land rental, all you can really do is walk around and chat. So be sure to claim it.
First, claim your gift.
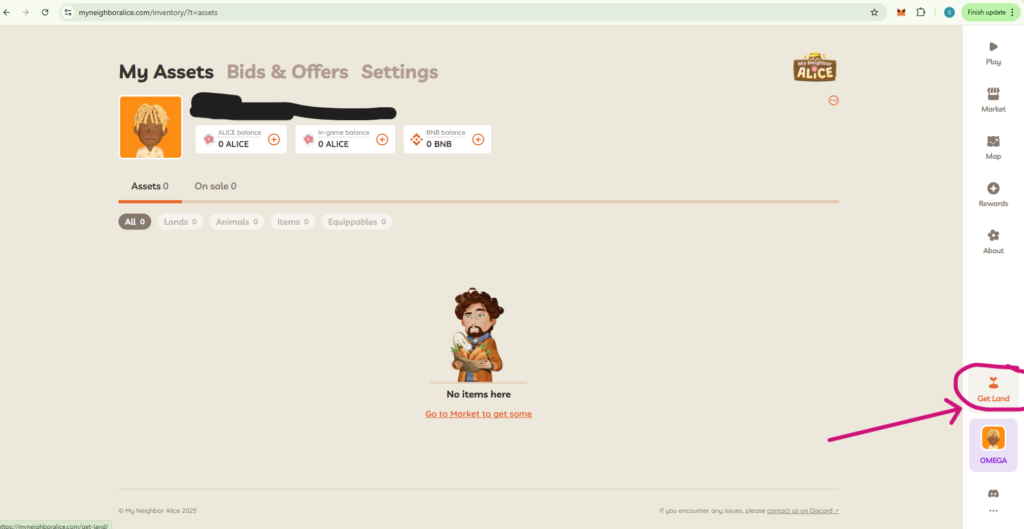
Now get your free land renal.
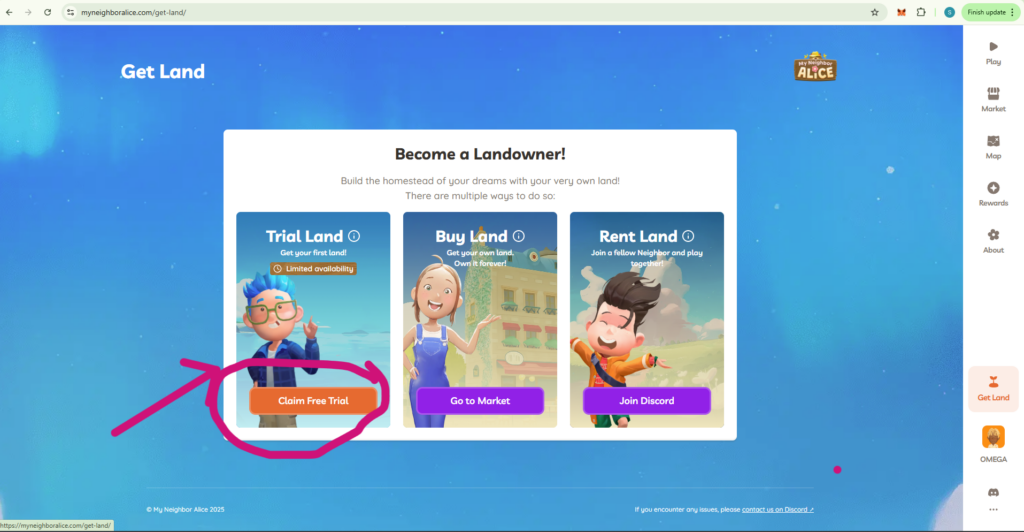
You will be given a choice to get Trial Land, Buy Land, or Rent Land.
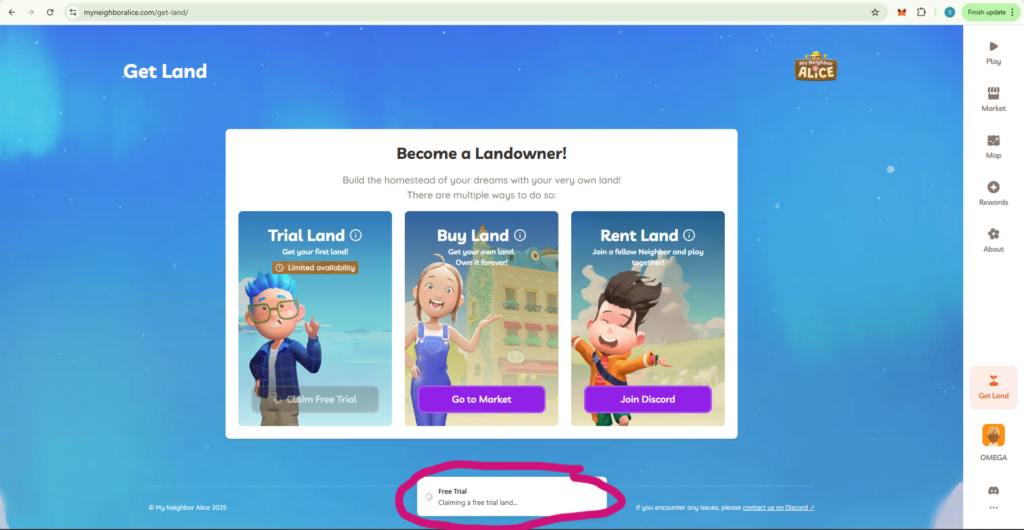
We recommend the free trial choice. Buying land can get expensive and cost hundreds of dollars at the time of writing. And renting land will cost Alice token which cost real money to buy.
You will be able to purchase your own land anytime once you are playing MNA. You will also be able to meet players who will be willing to share their land with you, possibly for free.
Trial land will be yours to build and work on until the end of season.
You are now ready to jump into the game.
You have now been assigned your land. This will be where you will spend most of your time and where your neighbors can come and visit.
Note: Pudgy Land is for player who hold Pudgy Penguin NFTs. These NFTs were create before MNA and can get very expensive! As a new player, don’t worry about these yet.
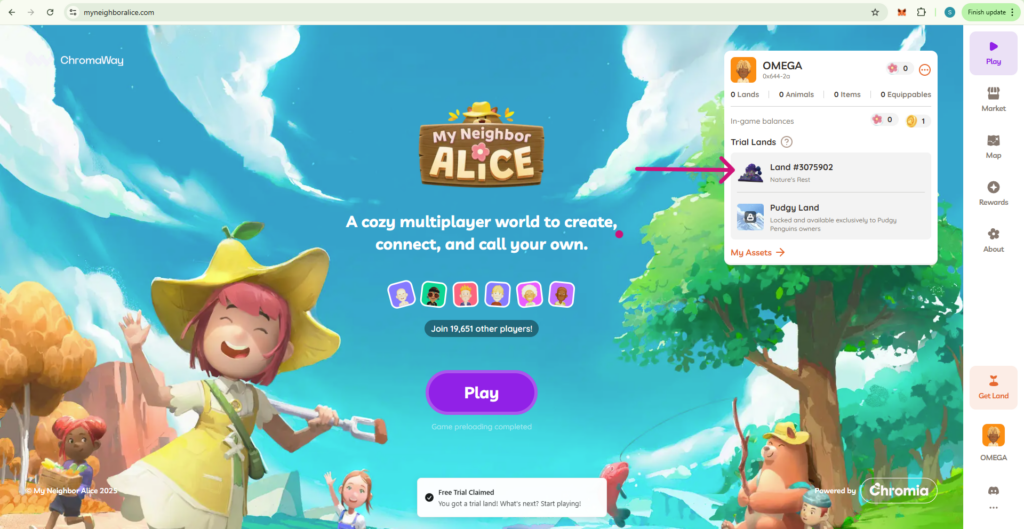
Now click Play and we will see you in Lummelunda!
Creating an Avatar
An avatar is your character in the game. Play with your look until you’re happy with it.
Note: You will be able to change your avatar at any time during the game by visiting a salon in any Town Hub for free.
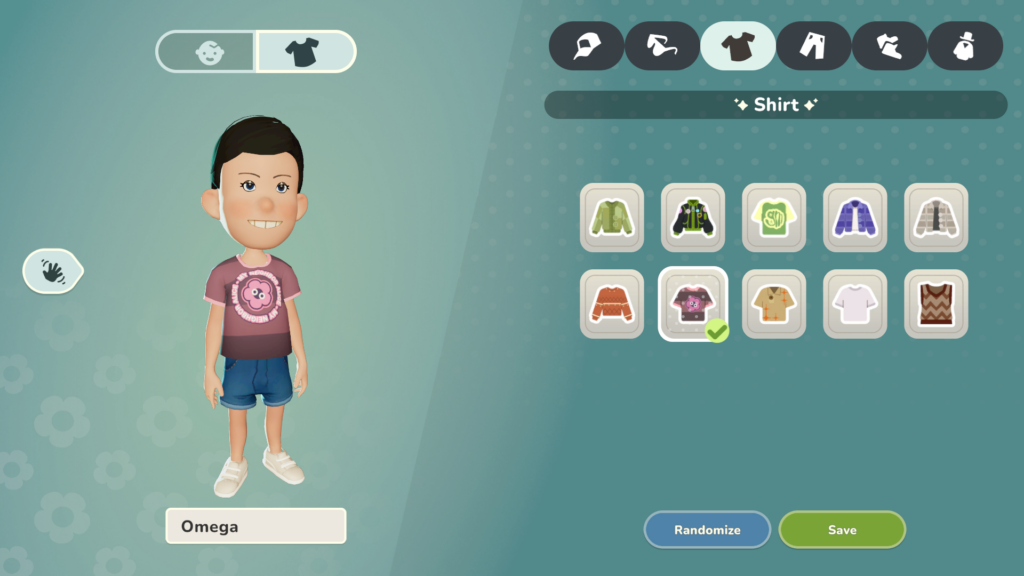
Don’t forget to choose your name.
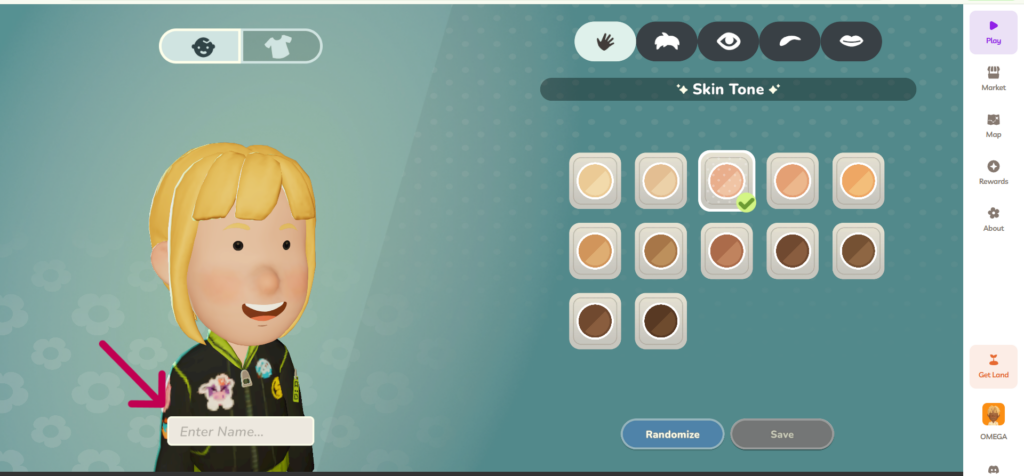
Click save to continue.
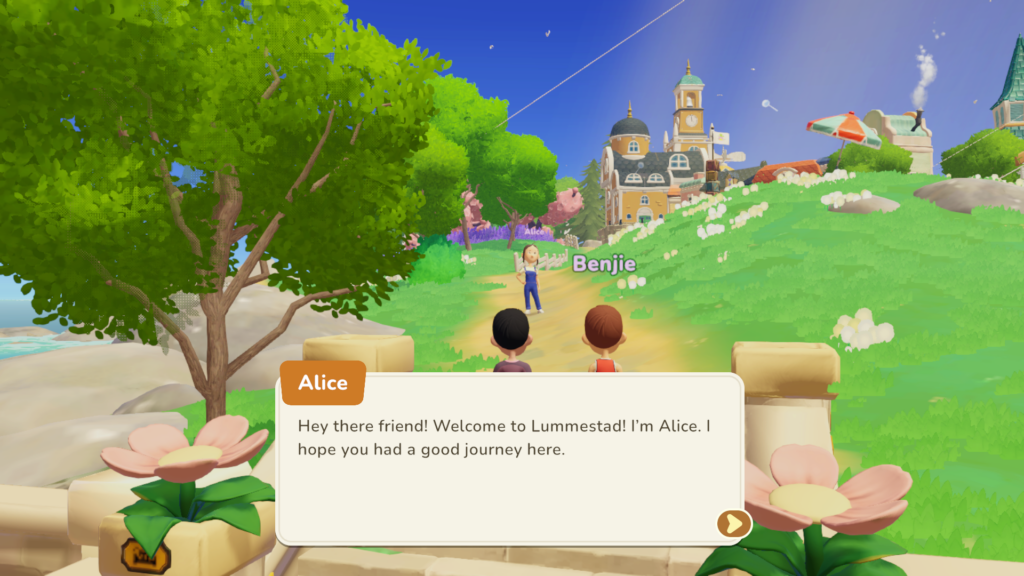
Playing the Game
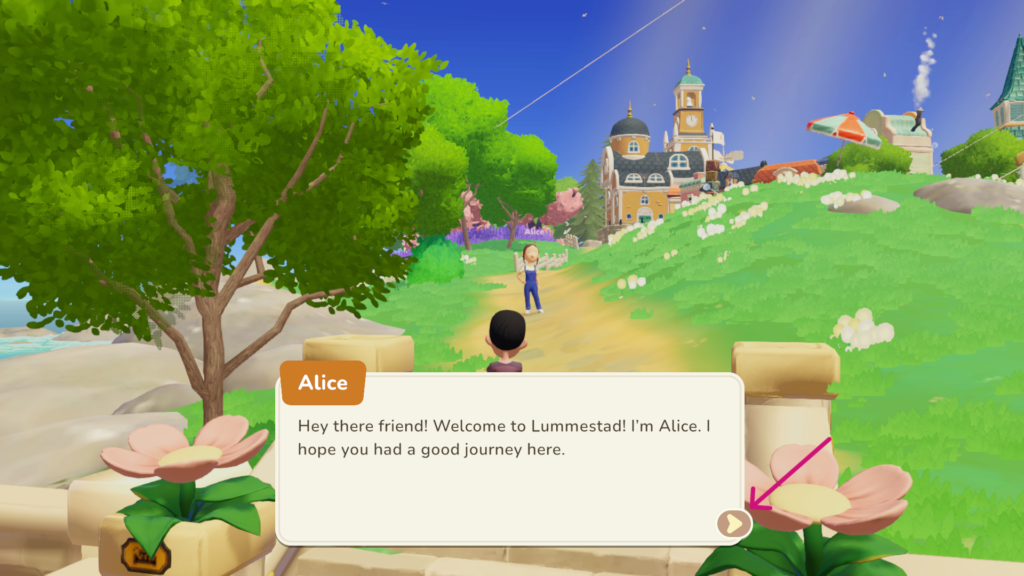
Welcome to Lummestad!
Alice will greet you as you enter. She is a non-player character (NPC) and will guide you through the first steps in the game. This is where everyone starts when they log into the game. Other real players may show up beside you.
Follow the quest line and read carefully. Being a new game, not all the details are provided in your quest log; however, what you need to do is often described by quest givers.
This is where everyone starts. You can see Benjie, a real player beside us. Hi Benjie!
Press the arrow at the bottom of dialogue box to continue with the story.
Follow the directions and approach Alice with the ASDW or arrow keys on your keyboard. To interact with people and objects use the E key on your keyboard.
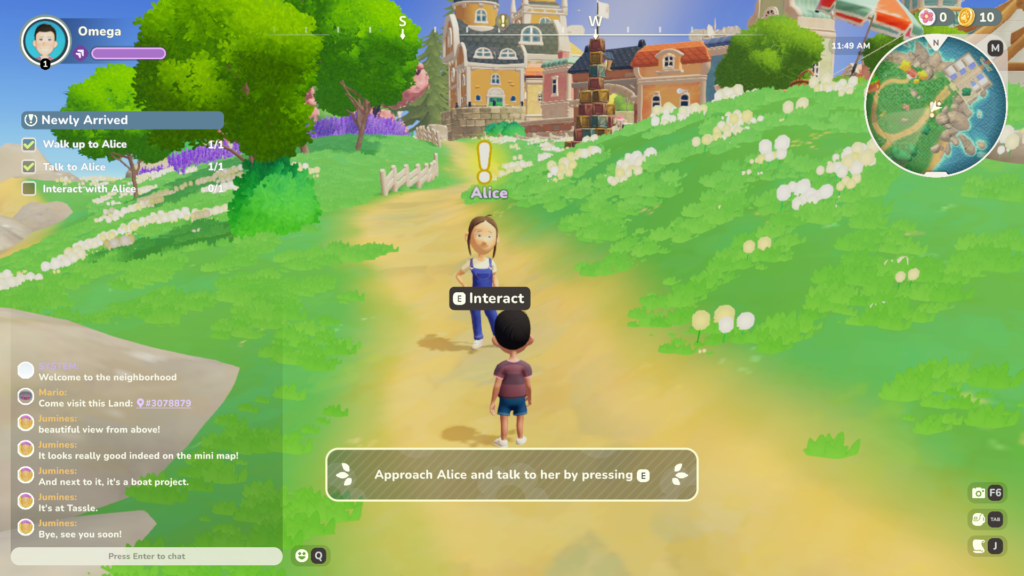
After you talk to Alice, turn around and head back toward Jose. You will then complete your first quest!
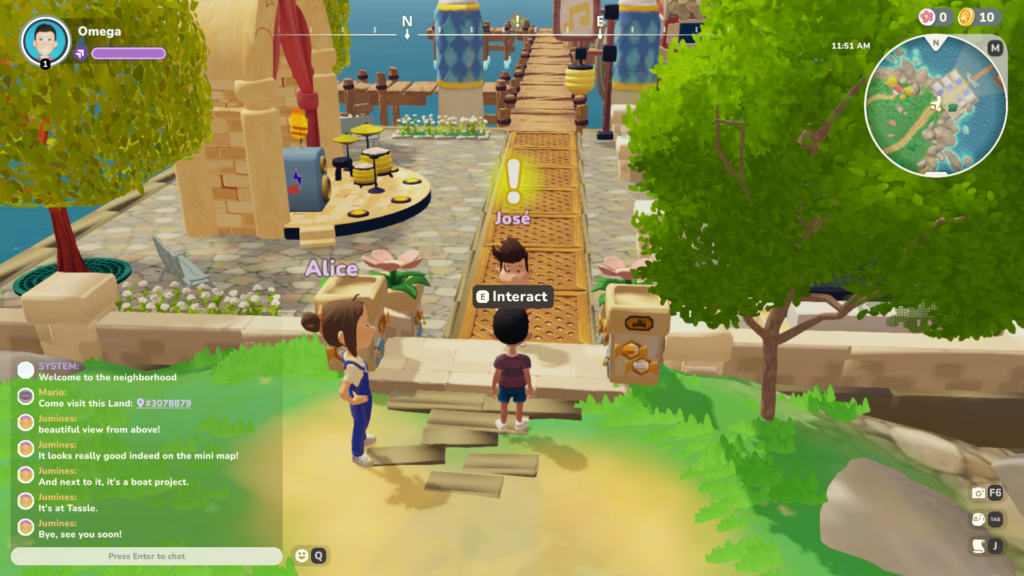
Now talk to Jose using E and accept his reward.
Get ready to travel to your land! This land is the free rental Trial Land you claimed in the Getting Free Trial Land section. Use the M key to bring up your map.
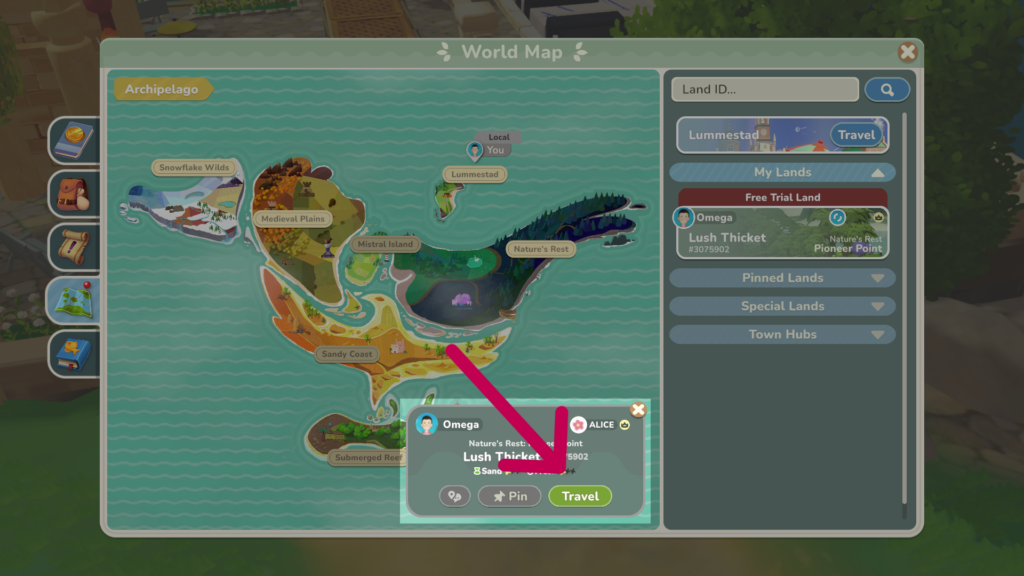
Don’t forget to click the green Travel button!
Note: Players are assigned random lands with different look and vegetation, but the quests will be the same.
Trial land players cannot choose the type of land they would like to have. When you are ready to purchase your land, you will be able to choose between lands on sale with different looks and quality of soil and water.
Quests On Your Land
When you arrive on your land, look for green check mark. It may be hidden in the trees so search carefully.
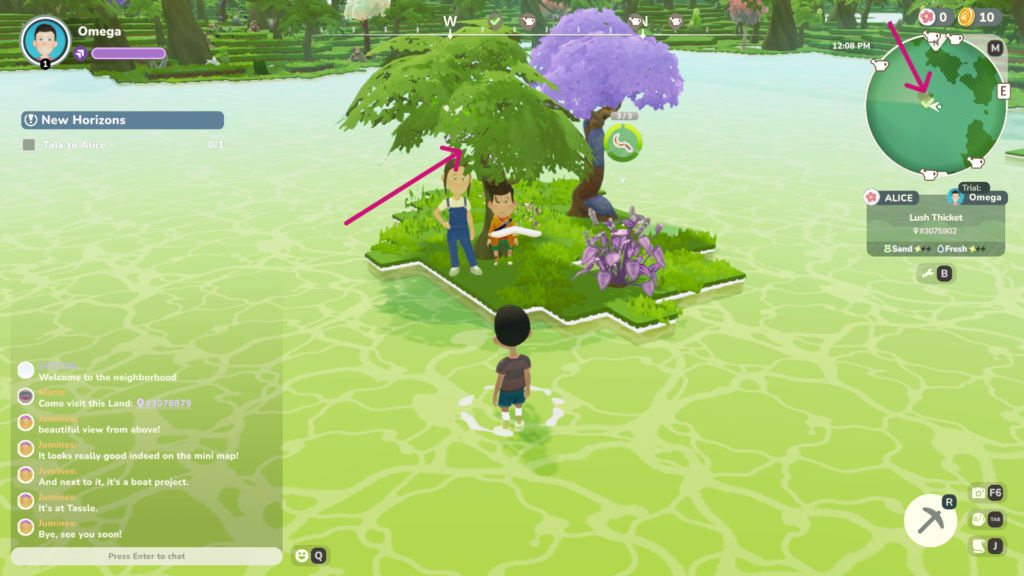
It should be over Alice’s head. If you have trouble finding it look on the mini map found at the top right hand corner of your screen.
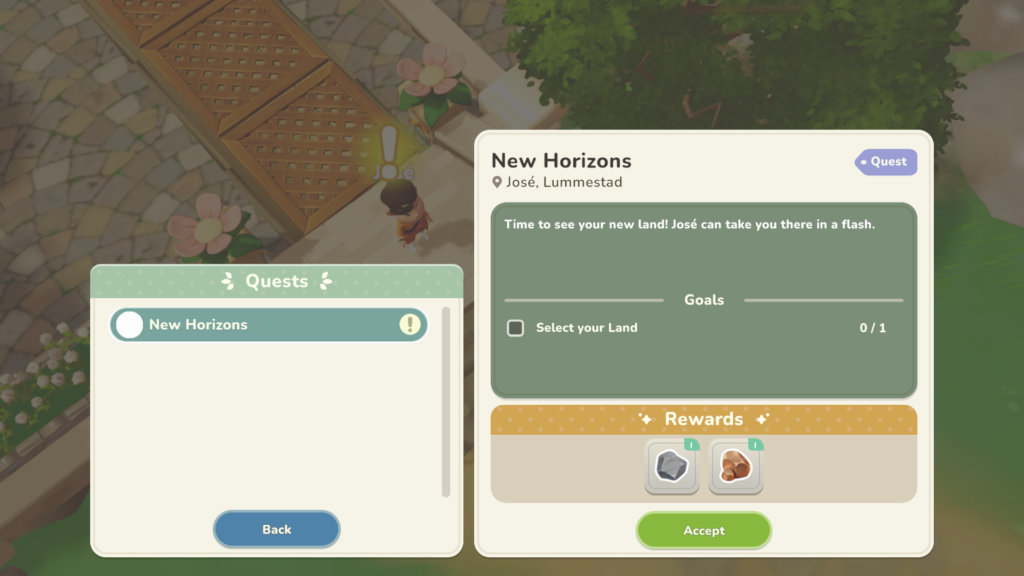
Quest: New Horizons
Talk to Alice. She will introduce you to Jose who will take you to your new land.
Complete the New Horizons quest.
Talk to Alice again and accept.
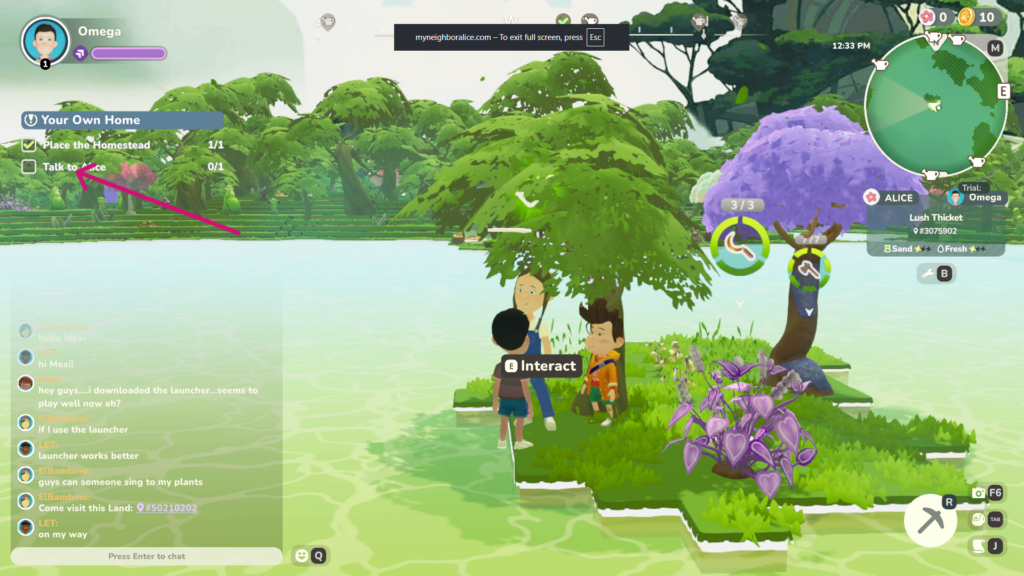
Quest: Your Own Home
Alice will give you a tent and ask you to place your tent somewhere on your land.
Press B. The inventory screen will pop up.
Click on the tent and look for a flat piece of land to place your home. A green highlight will show underneath if it is an acceptable spot.
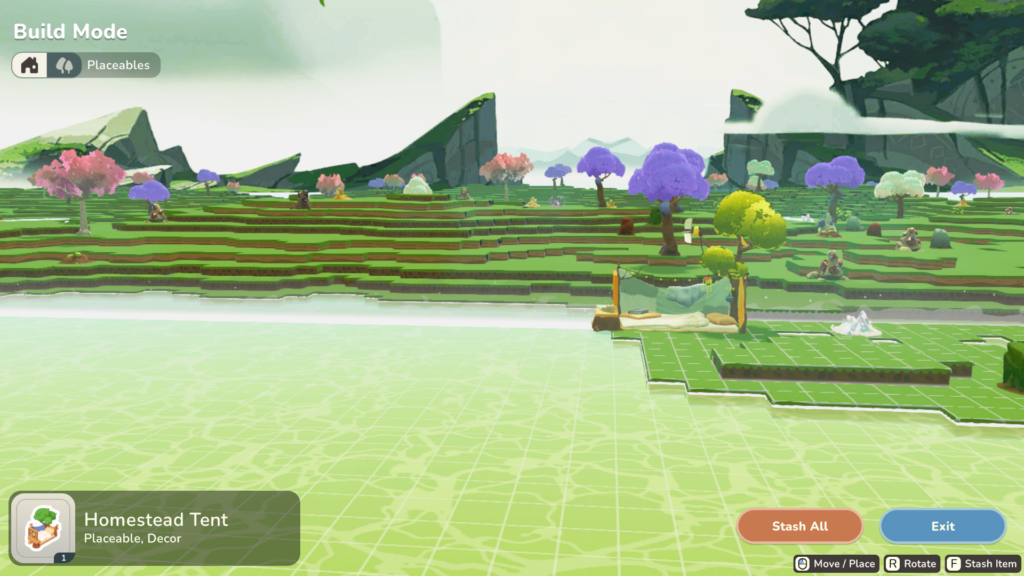
Press Esc to exit out of the inventory window.
Continue to follow the quest line. Look at the quest requirements on the top left side of your screen.
Eventually, Oli will appear beside Alice and will have a check mark over his head. That is the next person to talk to.
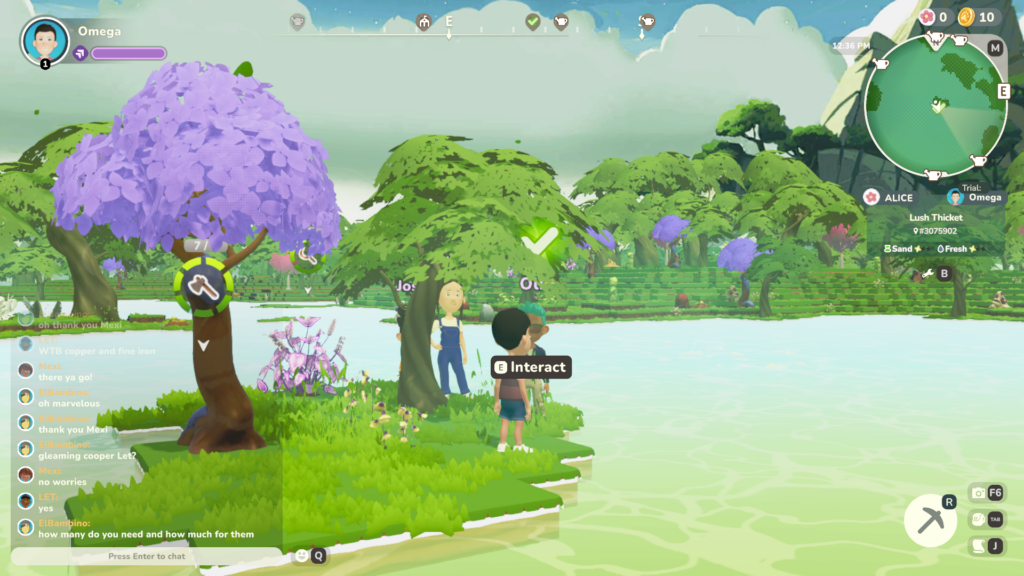
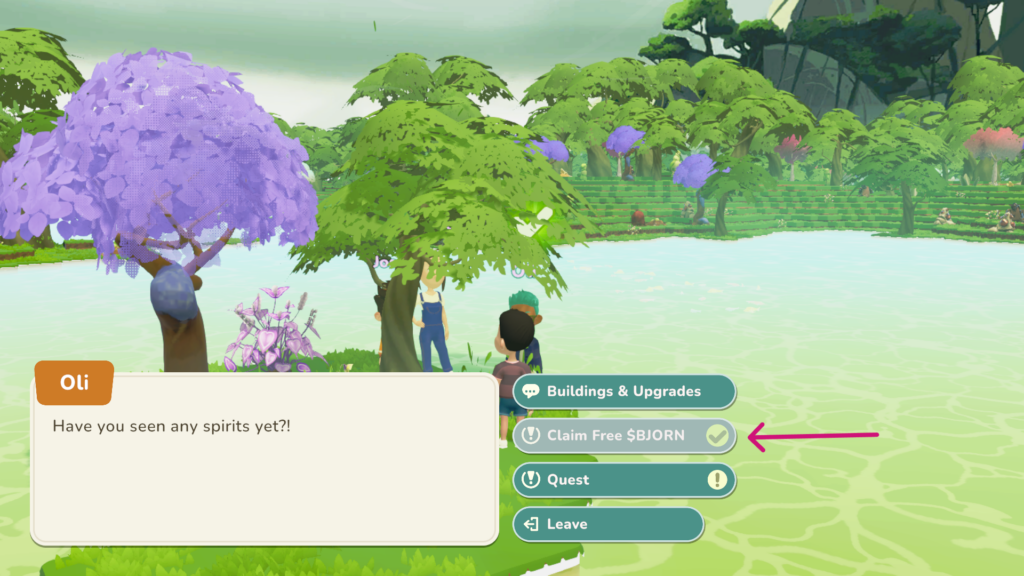
Oli Quests
Oli is your good friend because he will give you money daily. He will give you Bjorn, shown as gold coins on the very top right of your screen. These coins are used within the game to purchase things and craft.
Oli will give you 2 quests daily:
- Quest for 17 Bjorn for free
- Quest for 31 Bjorn for completing a quest
Pretty much every transaction requires Bjorn, so never let your Bjorn coins go down to 0. If that happens nobody can help you until Oli comes around the next day.
Complete the free Bjorn quest.
Quest: Excited Enthusiast
Hand it in.
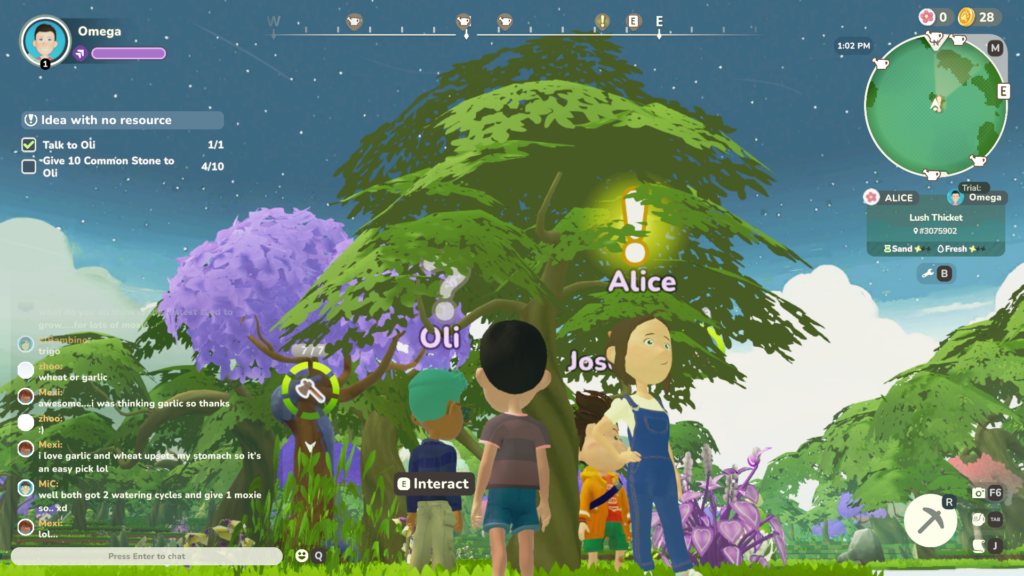
Accept the Idea with no resource quest. However, you will not be able to complete it for a while.
Oli asks for 10 stones but you don’t have the tools to get them yet.
Wait! Continue with the quests that you can do because Alice will give you the tools to get them but also the 10 stones and money.
Instead talk to Oli and accept.
Quest: An Exciting Partnership
This quest will introduce you to Oli and activate daily quests that will reward you with Bjorn coins. Oli is your most reliable source of Bjorn coins which are necessary for in-game transactions.
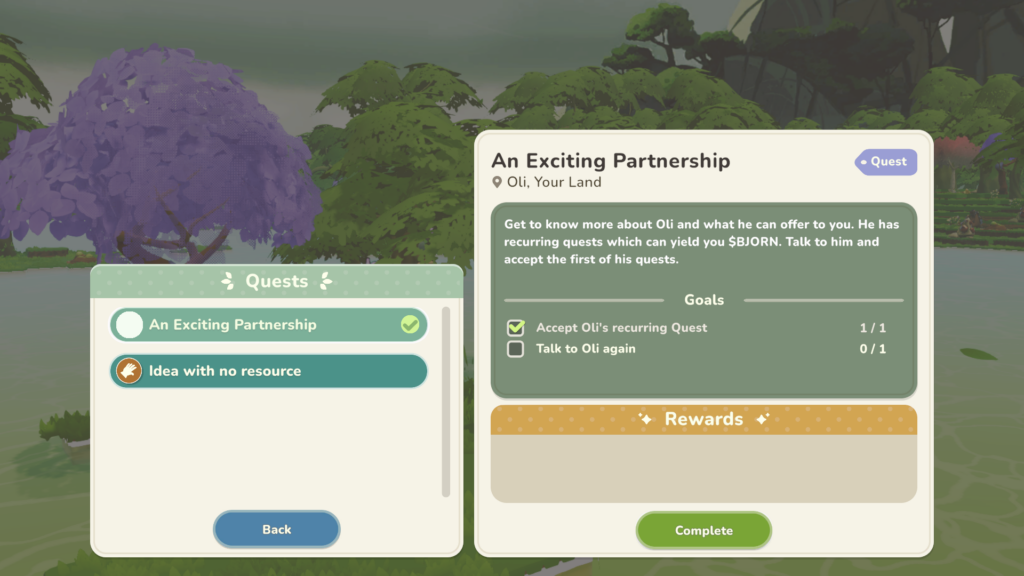
Once completed, Oli will have a white question mark over his head, meaning that he still has an incomplete quest. This is the one we chose to wait on above
BUT
Alice will have a yellow exclamation mark (!) over here head, meaning that she has a quest for you.
Approach Alice and talk to her and accept.
Quest: Land Warming Gift
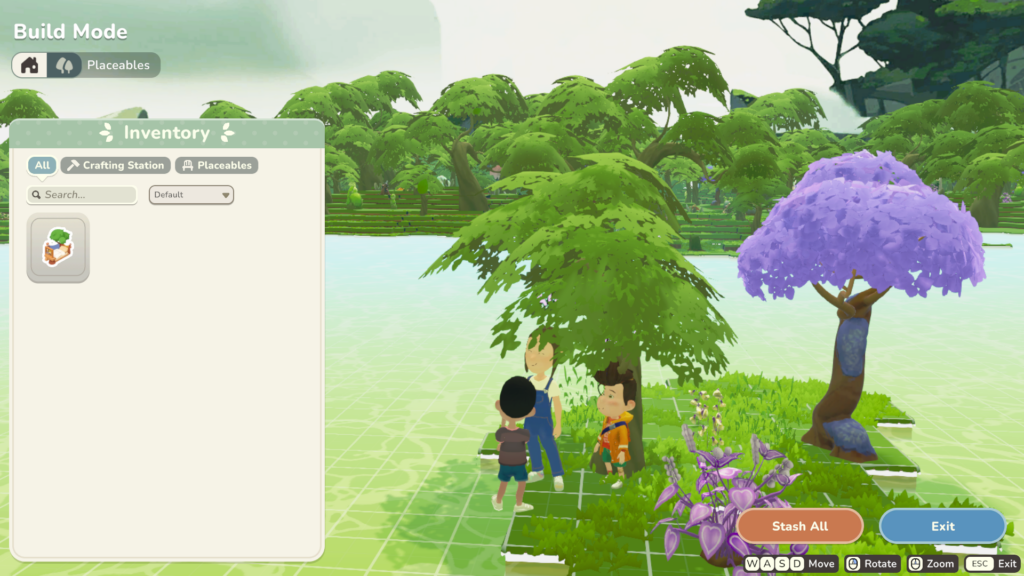
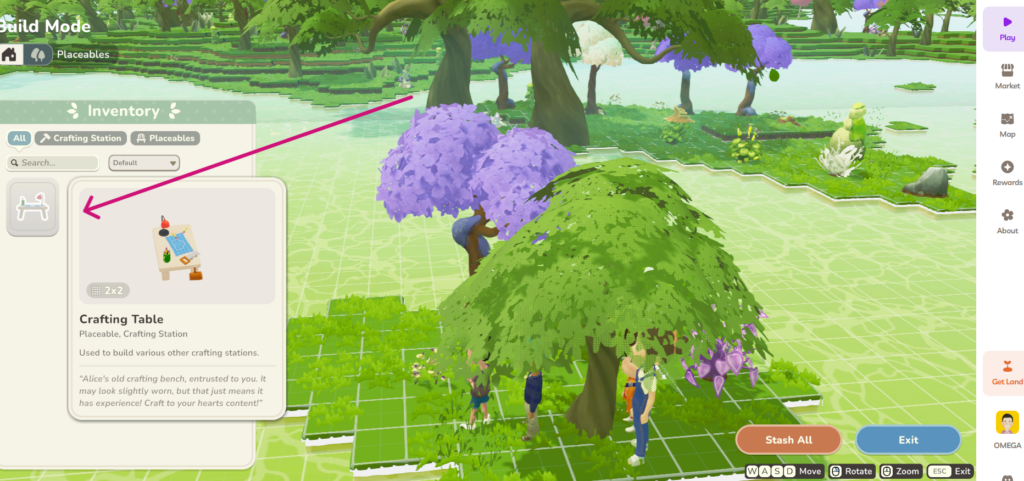
Talk to Alice. Alice will give you a crafting table. The Crafting Table is where most of your other crafting of tables, refineries, and other machines will be made.
Quest: Crafting Corner
Alice will ask you to place a crafting table on your land.
Press B. An inventory window will open. Click on the crafting table and find a spot with flat land to place it.
Talk to Alice again. Sometimes the NPCs are so close together that Jose or Oli will be jumping into the conversation. Make sure your interact button is pointing directly on Alice.
Quest: Only the Best for the Best
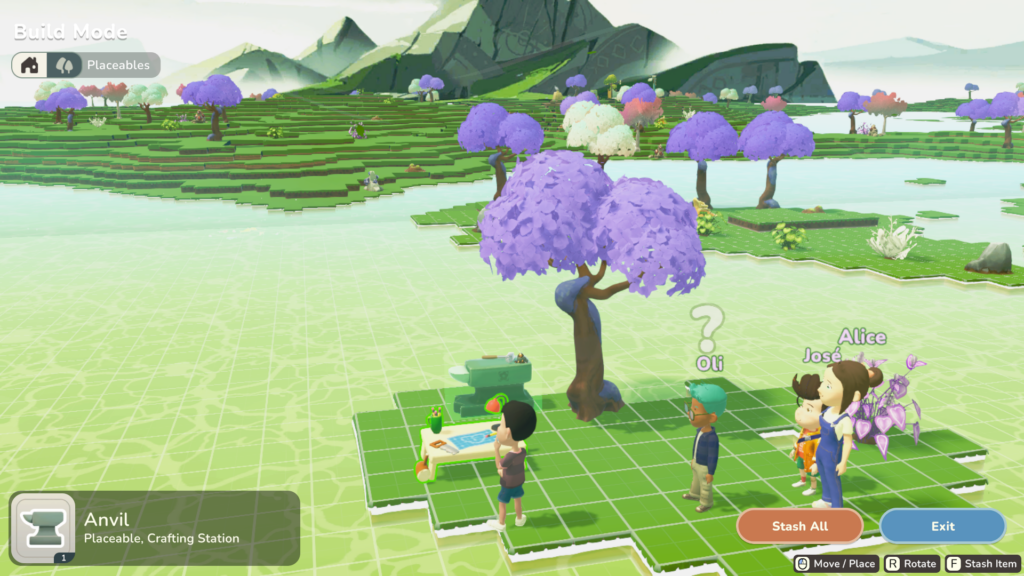
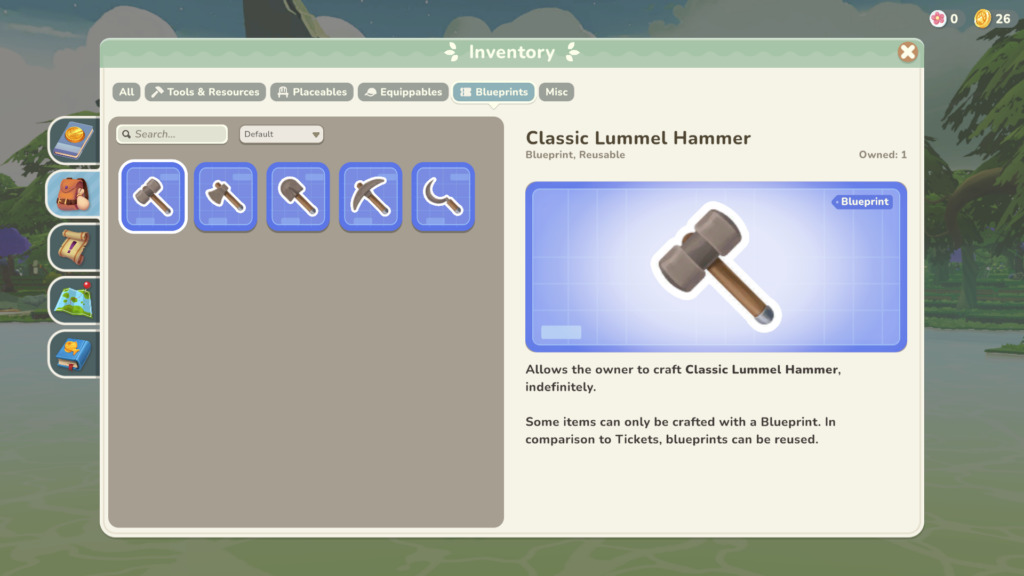
By talking to Alice you will get a ticket to craft an anvil. Tickets are used to limit the number of those things you can build and are consumed when you build it.
You will be using an anvil to craft all your tools in the future. Make sure you remember where you placed it.
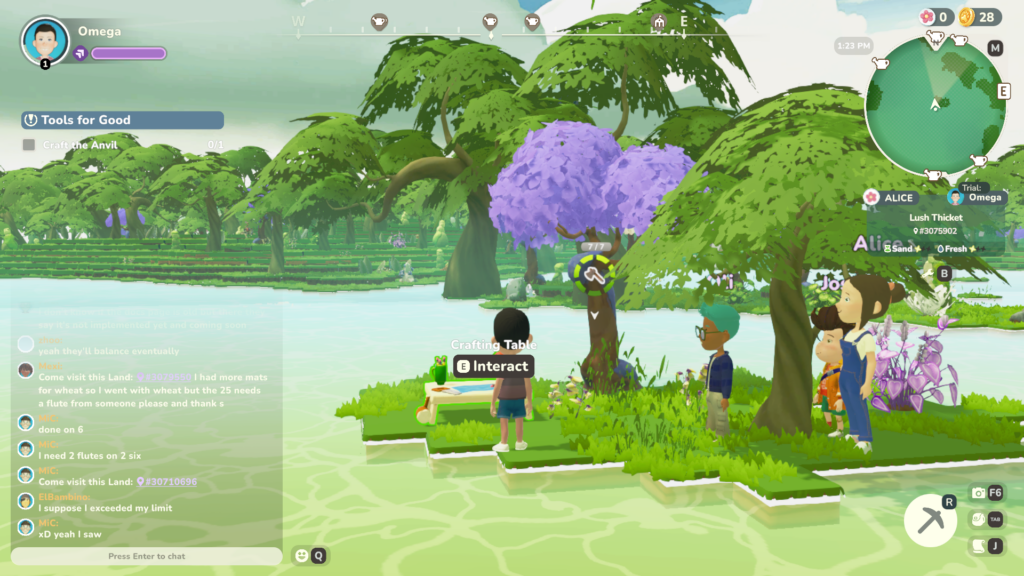
Quest: Tools for Good
Alice will ask you to craft an anvil. Go to the crafting table and press E. There you can select Anvil to craft.
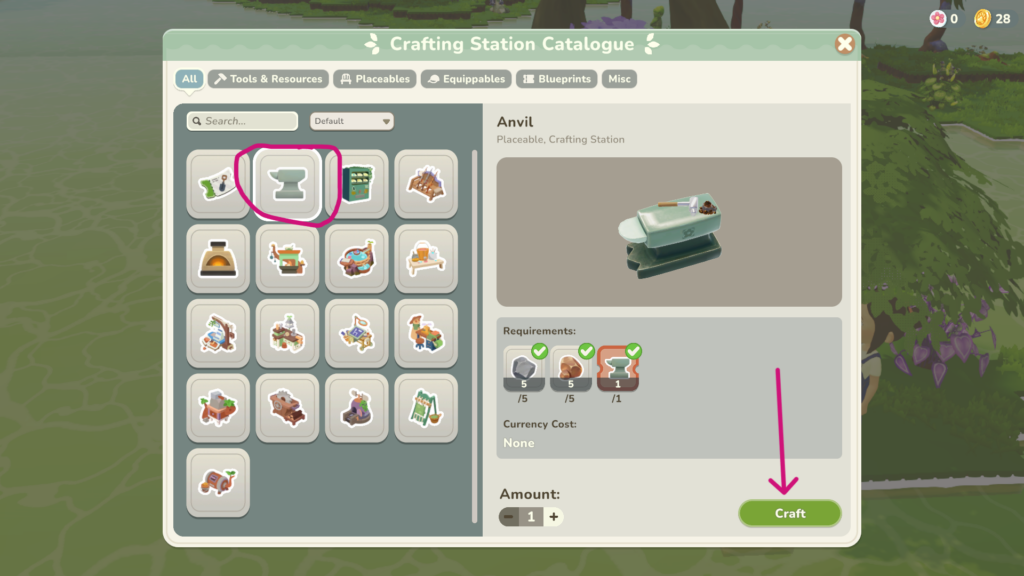
Notice it takes 5 common stone, 5 copper ore, and 1 anvil ticket. All of those components should’ve been given to you already by quest givers.
Continue with the quest once you have crafted it by placing it on your land.
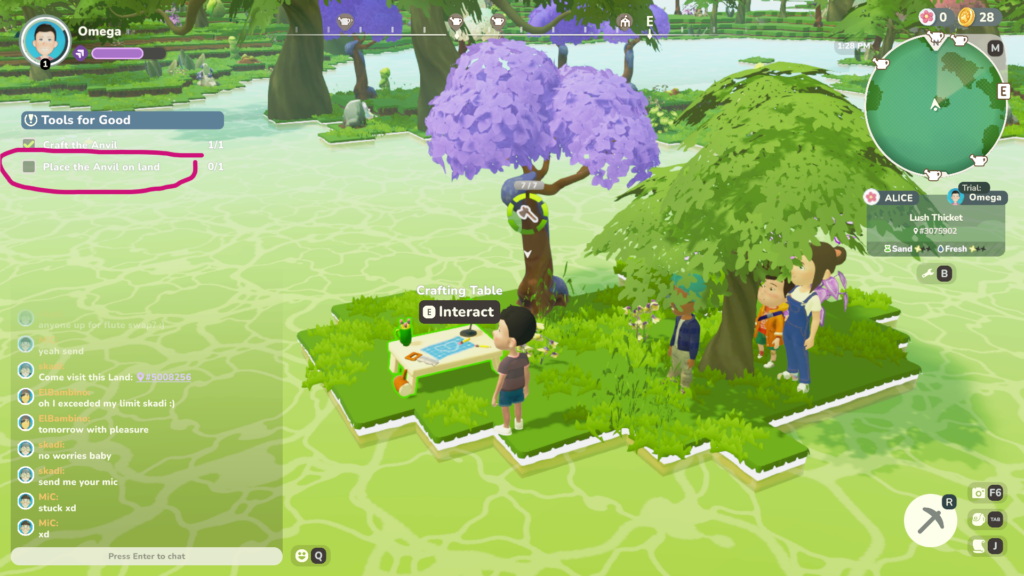
Press B and your inventory will open up. Select Anvil and place it near the crafting table.
Talk to Alice to complete the quest and obtain the next question.
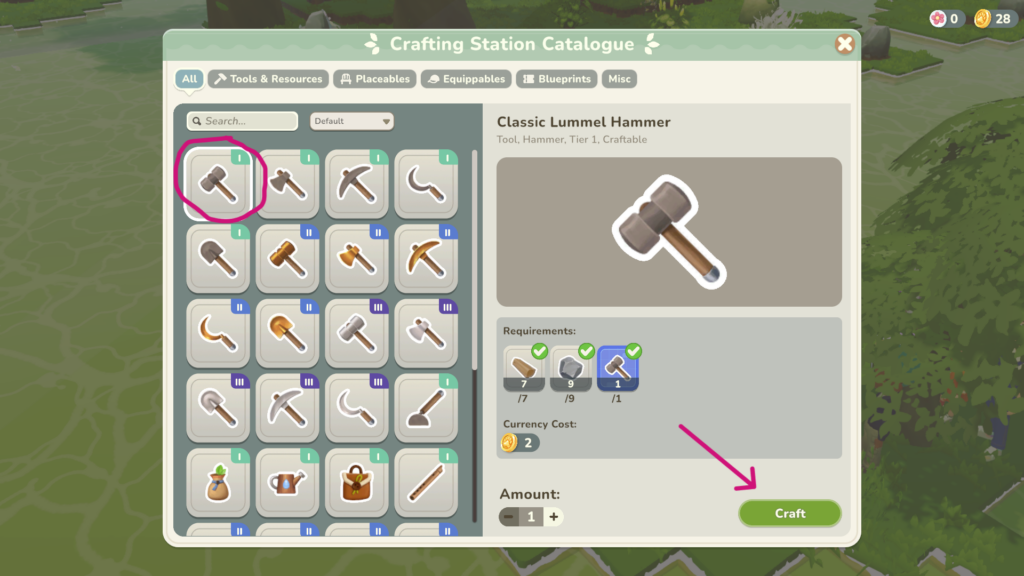
Quest: Hammer Time
Alice will give you a blueprint and resources necessary to craft a hammer. Go to the anvil and press E.
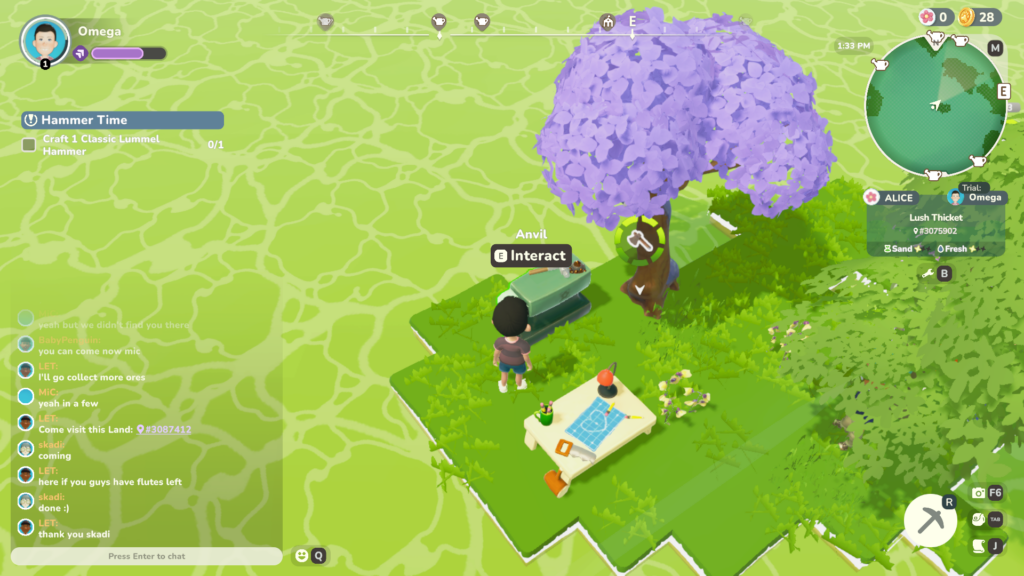
Now select the Classic Lummel Hammer to craft your first tool.
When you complete the quest, Alice will give you blueprints for all the tier 1 (T1) tools needed for gathering resources.
Each tool is used to gather one T1 resource. They are:
- Hammer used on common stone
- Axe used on samara wood trees
- Shovel used on island silt sand
- Pick axe used on copper ore
- Sickle used on wildweed plants
After you talk to Alice you will receive the next quest.
Quest: Between Rock and a Hard Place
Alice will ask you to use the hammer you just made to bring her 3 common stones. To find the stone look for grey boulders. They’ll have a grey hammer symbol over top of them.
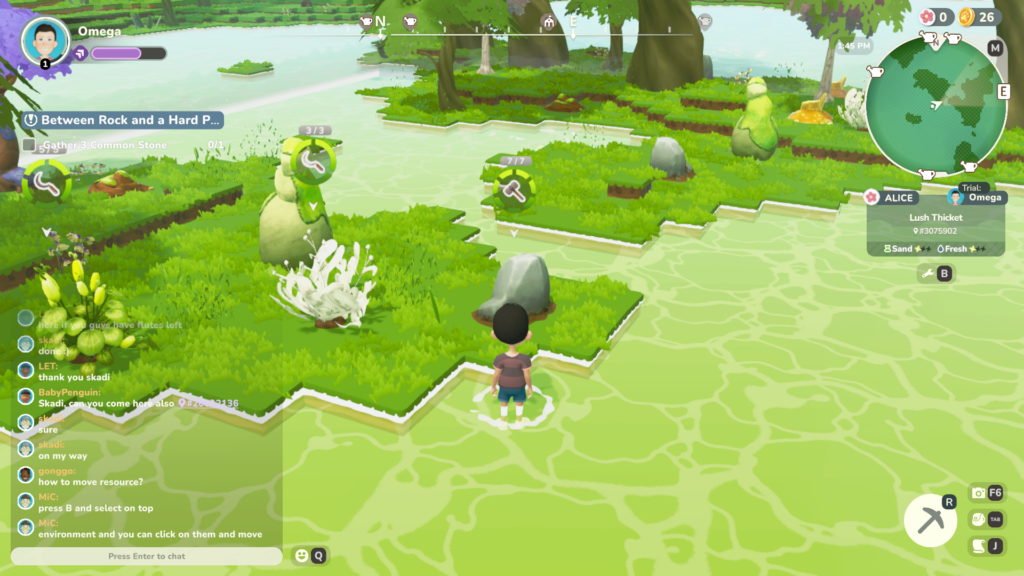
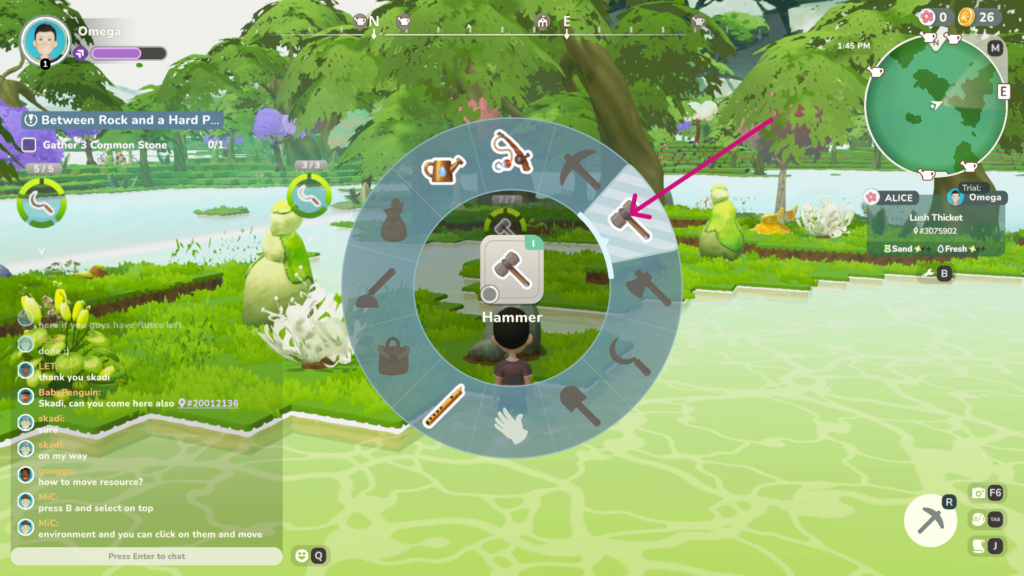
To equip your hammer press R and with your mouse, point at the hammer to highlight it. Once highlighted, select the tool by left clicking it.
Now move close enough to the stone until you see E Interact and then click the left mouse button.
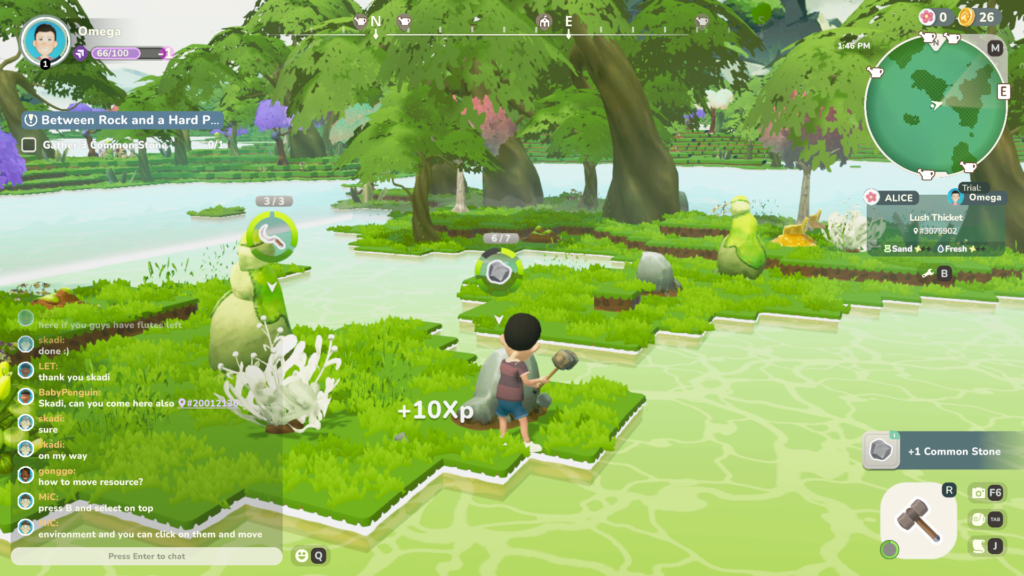
Once you have gathered the stone, return to Alice. She will reward you with plenty of stone.
You now have enough stone to give to Oli for his daily quest Idea with no resource. This is the quest you have put on hold described in Quest: Excited Enthusiast.
Quest: Idea with no resource
The quests above are necessary to complete this quest. They provide you with the means to gather the necessary resources. With the collected resources, Oli will now reward you with 34 Bjorn and be ready to give you more quests tomorrow.
Alice will not have any quests for you at this point but Hae-Won will appear at this point and start giving you quests too.
Quest: Where the sprouts start
Hae-Won is the NPC that introduces you to gardening. The next set of quests will teach you how to create seeds, plant them, care for them and harvest them.
Talk to Hae-Won, who will give you a ticket for a seed dispenser.
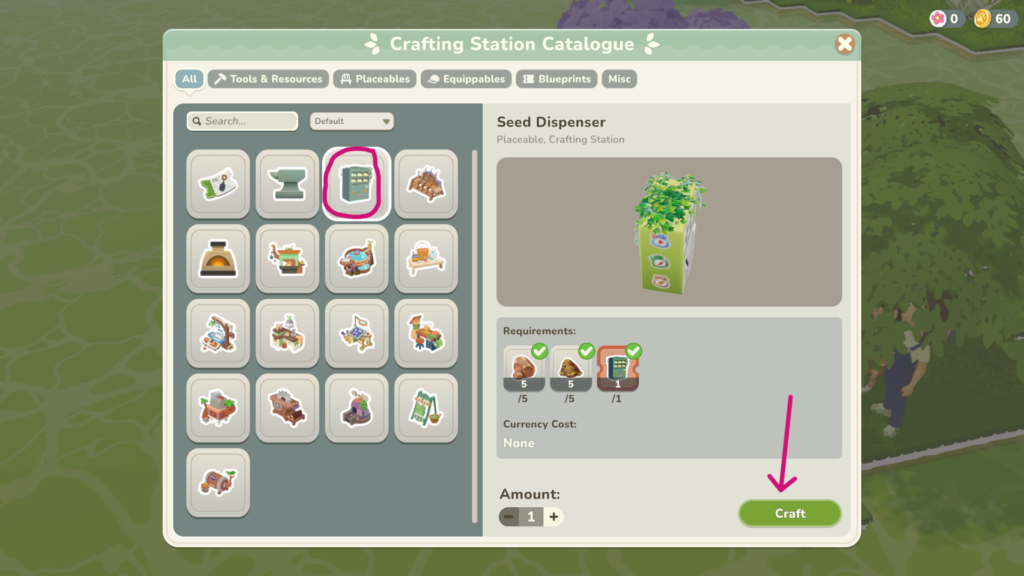
Quest: Seeds come from what?
Hae-Won is asking you to craft a seed dispenser. Go to your crafting table and craft the Seed Dispenser.
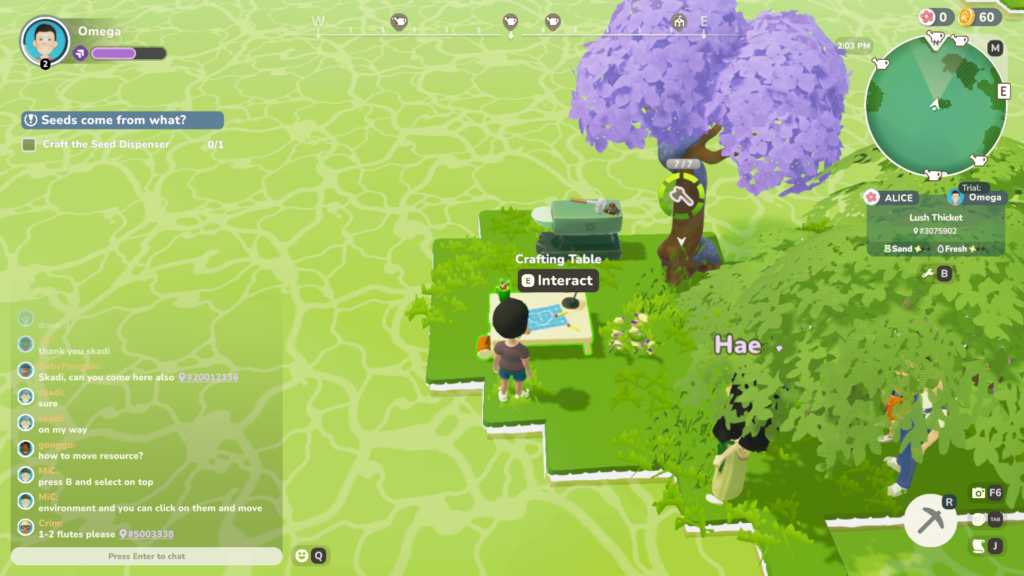
Press B and place it on the ground like you did the crafting table and anvil.Then talk to Hae-Won to complete the quest and accept the next one.
Quest: Seeds for me
Hae-Won is asking you to craft 3 carrot seeds. To do that, approach the seed dispenser and press E.
From the choices of seeds that can be made select Mist-veiled Carrot Seeds. On the bottom of the crafting window, increase the number to 3 since she is asking for 3 of them.

Talk to Hae-Won who will reward you with blueprints for all the gardening tools. These will be a:
- Hoe to dig soil before planting the seeds
- Seed bag to plant seeds
- Watering can to water the planted seeds (every 8 hours)
- Harvest bag to gather the seeds when the are mature ready to be harvested.
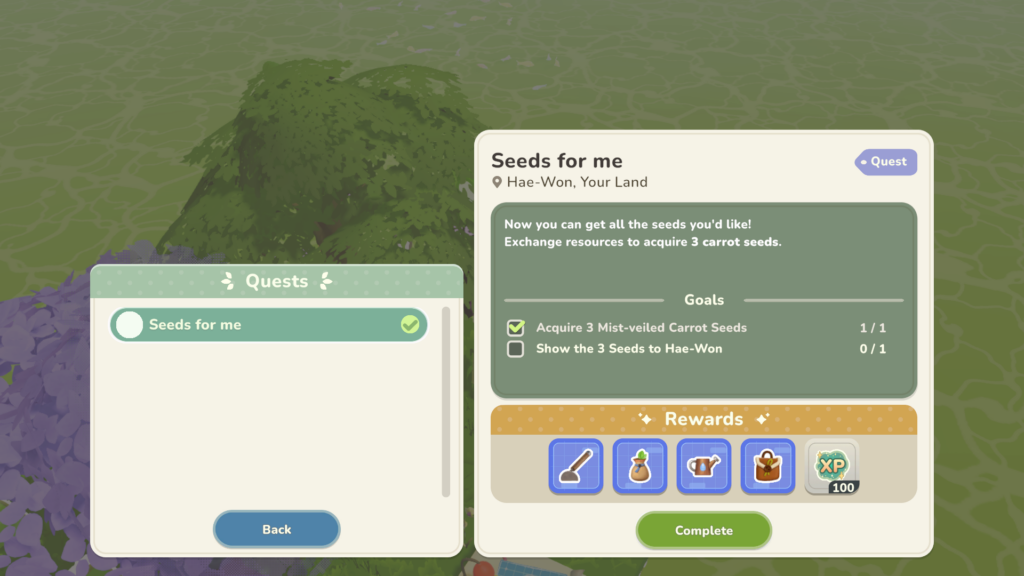
Talk to Hae-Won to receive the next quest.
Quest: Caring for your Sprout
Hae-Won will ask you to craft a garden hoe, a seed pouch, and a watering can. Go to your anvil, select the Classic Garden Hoe, and craft it. It will take 5 samara wood, and 7 common stone.
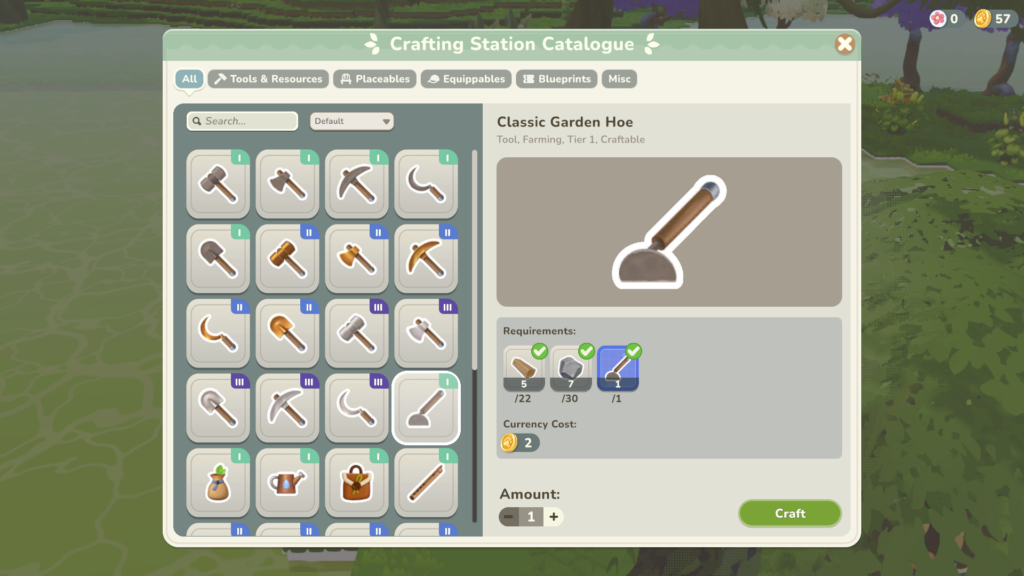
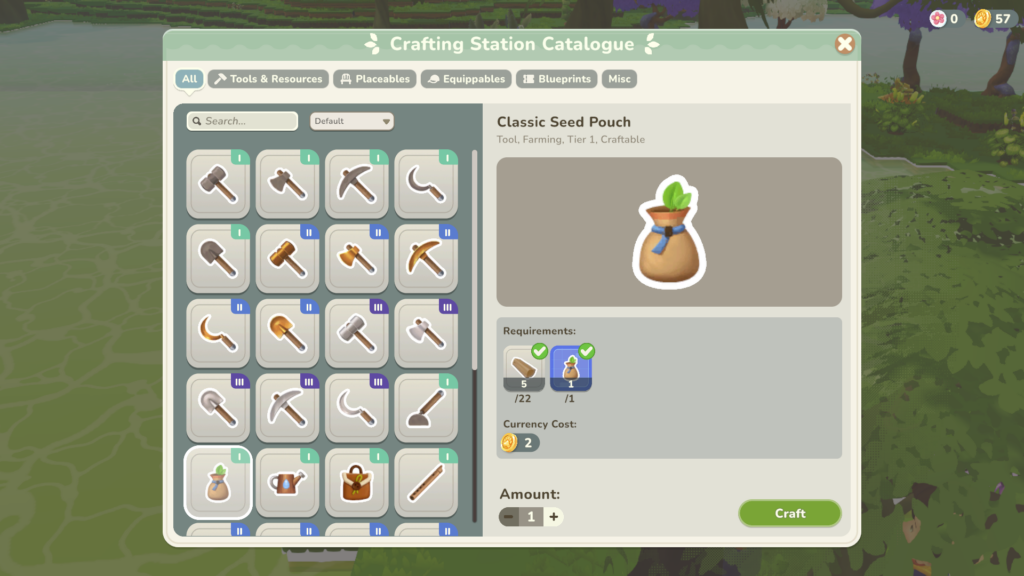
Select a Classic Seed Pouch and craft it as well. The seed pouch requires only 5 samara wood.
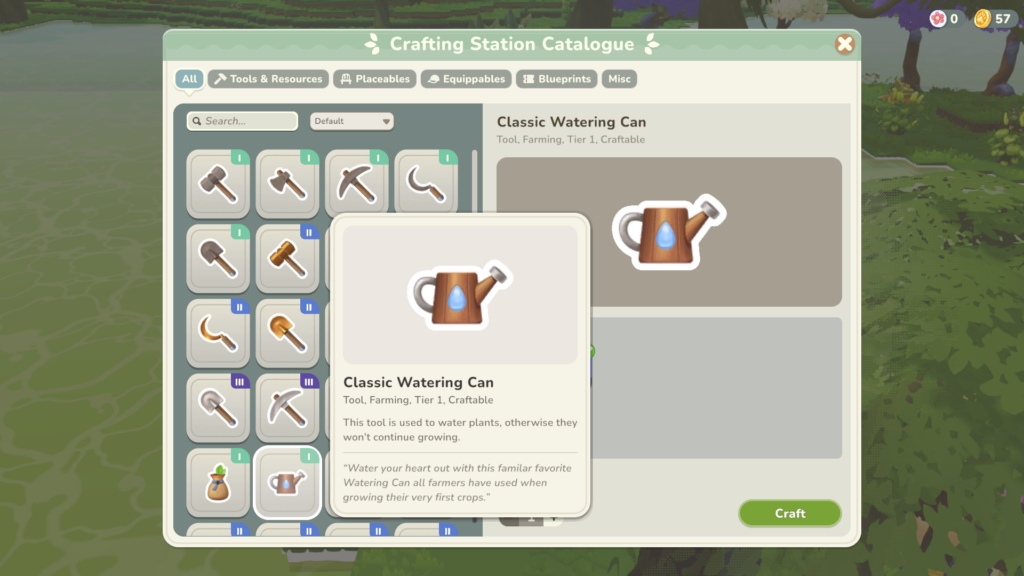
Finally, also craft a Classic Watering Can requiring only 3 samara wood.
Talk to Hae-Won and complete the quest. Continue on by accepting the next quest.
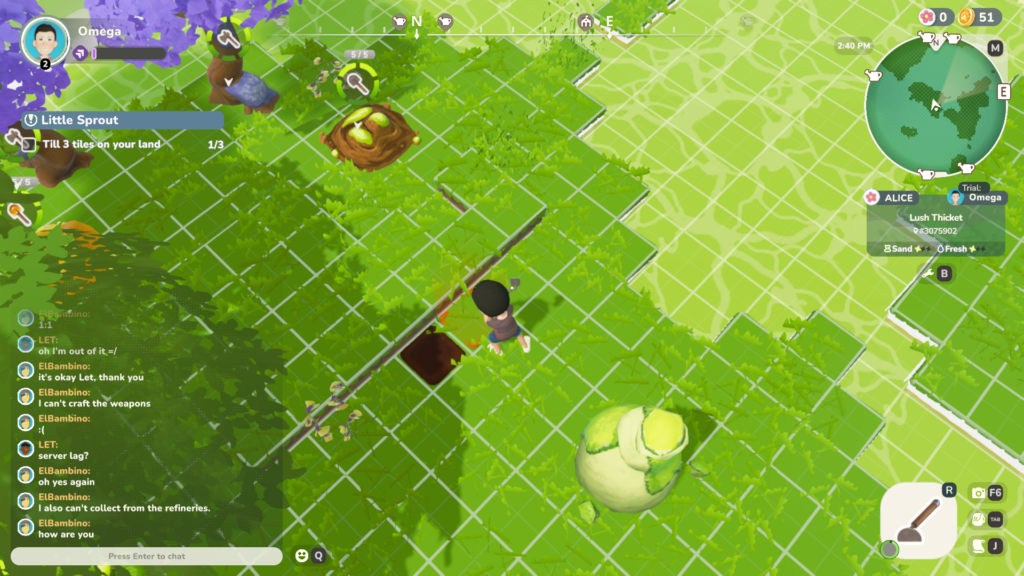
Quest: Little Sprout
Hae-Won will ask you to till 3 squares of land. To do this, equip your hoe by pressing R and select the hoe.
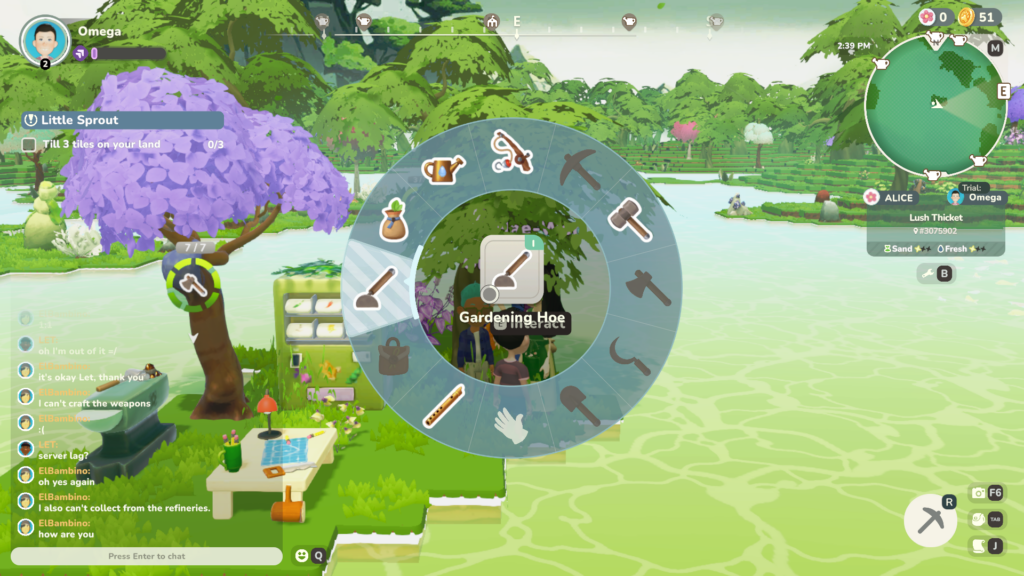
With your hoe equipped, find 3 squares of land beside each other, preferably flat. Left click on your mouse when the square of land you selected is green. You may need to move around to get the square to turn green.
When you have tilled 3 squared, press R and select your seed pouch.
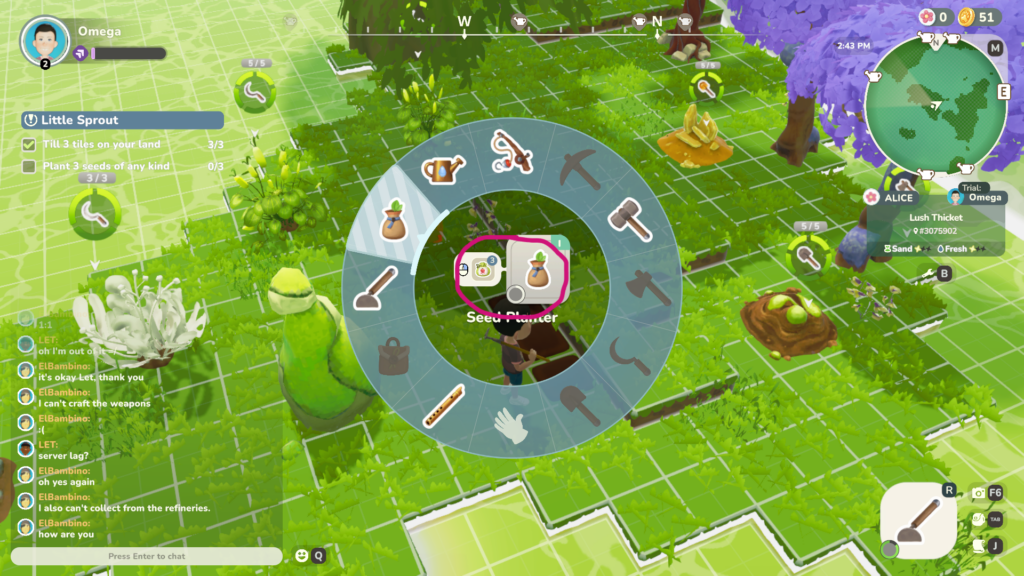
You will notice that you have 3 carrot seeds available. When playing the game later on, you will be able to select which seeds to plant by right clicking on your mouse.
Select one of the squares you’ve tilled, and with your seed bag equipped, left click. You will see a yellow circular progress bar as the seed is being planted.
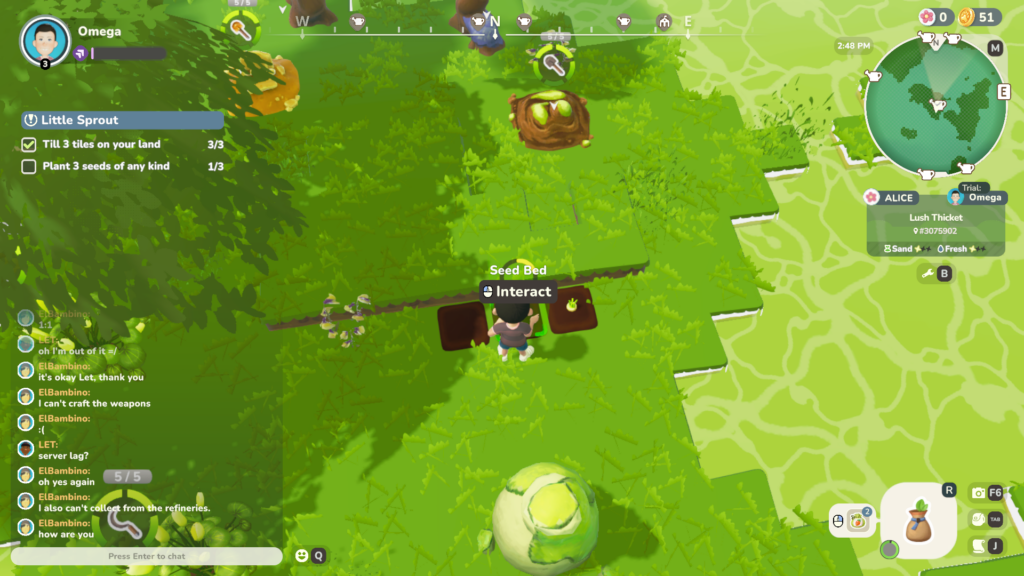
Repeat until all 3 seeds are planted. Next, we’ll need to water your seeds.
With the watering can equipped, mouse over each square to select the plant you want to water. Left click to begin watering. Make sure the blue circle goes all the way around as you are watering.

Once you watered all 3 carrots return to Hae-Won to complete the quest. Once you complete the quest, Hae-Won may move to Lummestad to give you the next quest.
Quest: The Measure of Moxie
Hae-Won will ask you to eat 20 carrots to increase your Moxie. Moxie is an experience boost used to help level your character. We’ll talk about this more below. Press I to open your inventory and select the carrots.
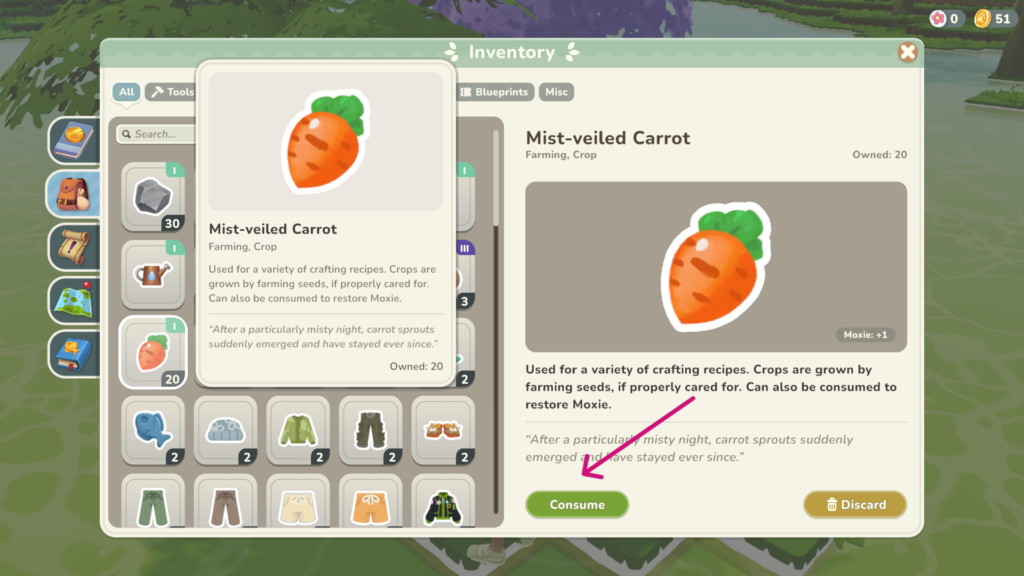
Because she asked you to consume 20 of them, you must eat all of them for the quest to complete.

What is Moxie in My Neighbor Alice?
Moxie is a boost gained by consuming food and fish which allows you to gain character levels faster.
Levels in My Neighbor Alice
Levels and Moxie were introduced in Chapter One in June 2025. To date, they have no impact on the game play but plans are that they will be beneficial as the game grows down the road.
Talk to Hae-Won to complete the The Measure of Moxie quest.
Hae-Won will not have any more quests for you at this time, but Alice will. She should have an exclamation mark (!) over her head, indicating she has a quest for you. Pick up quest from Alice.
Quest: Itchin’ for some fishin’
Alice will introduce you to fishing in MNA by giving you a ticket to craft a fishing rod stand.
Quest: Feelin’ the Thrill of Realin’
Alice will ask you to craft a fishing rod stand. Go to your crafting table, select the Fishing Rod Stand, and craft it. The stand requires 5 samara wood, 5 island silt, and the fishing rod stand ticket to craft.
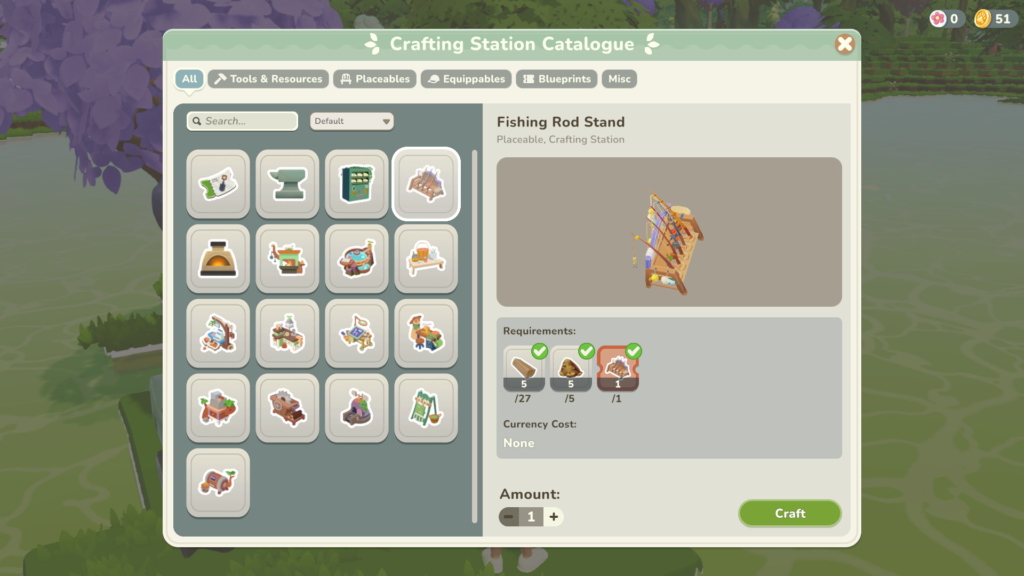
Alice doesn’t require you to place it, so it can stay in your inventory and be placed later when needed.
Once you’re done, return to Bjorn the bear to complete the quest.
Quest: Your First Catch
Bjorn is asking you to fish and catch anything on your land. Press R and equip your fishing rod. Notice he gave you some bait to use as part of the quest.
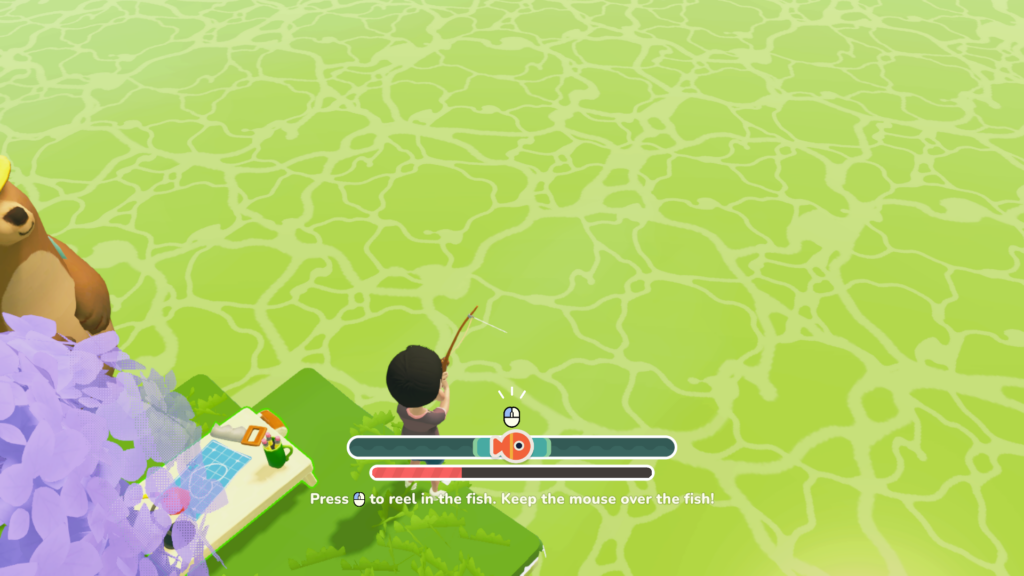
With your fishing rod selected, point your mouse on water and left click.
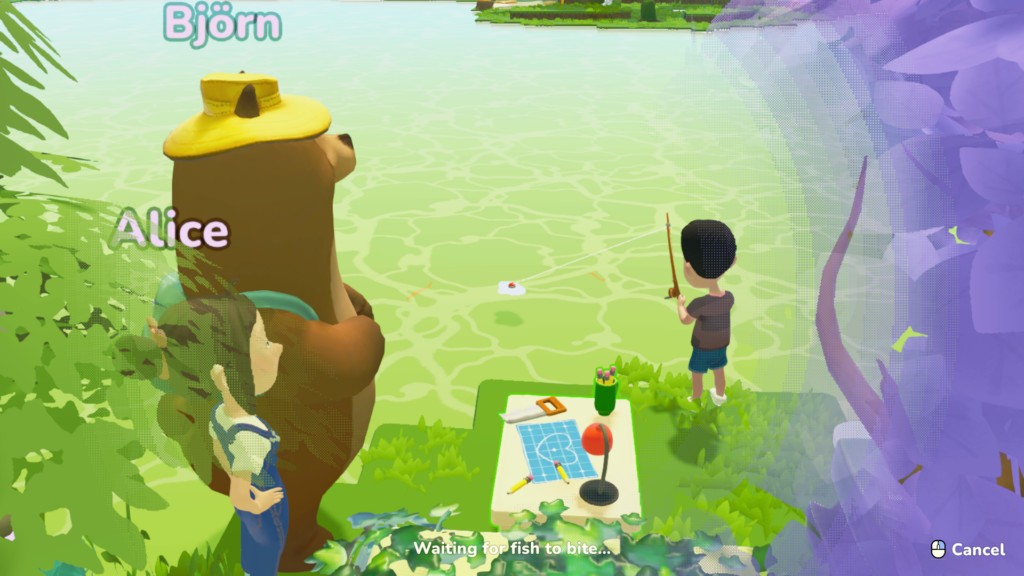
Wait until you see an exclamation mark (!) over the fishing bobber. When the exclamation mark appears, left click repeatedly and move your mouse left and right to keep the fish symbol within the blue area.
Return to Bjorn to show him your catch and talk to Alice to complete the quest.
Quest: Welcome to Lummestad
At this point, Alice will whisk you to Lummestad and you will find yourself at the starting point.
Look at the compass on the top of the screen and head for the green check mark.
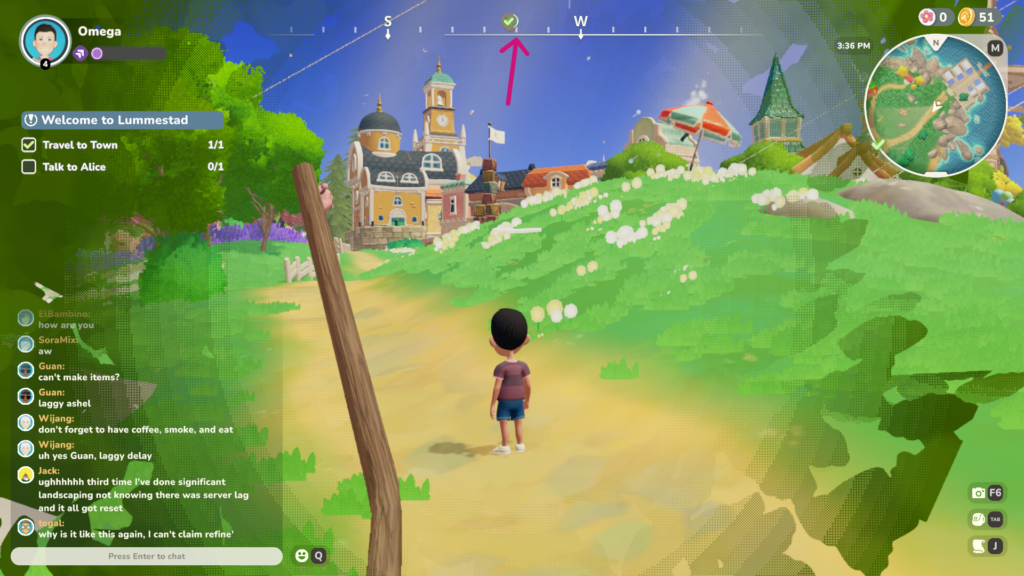
You will find Alice by the City Hall, where she will have couple of quests for you.
Complete the quest by talking to Alice.
Quest: How to say Hello
When you talk to Alice she will give you a set of emojis.
Emojis are used to bring your character to life. When you select one, your character will act out the emotion. Press Q and select the emoji of your choice.
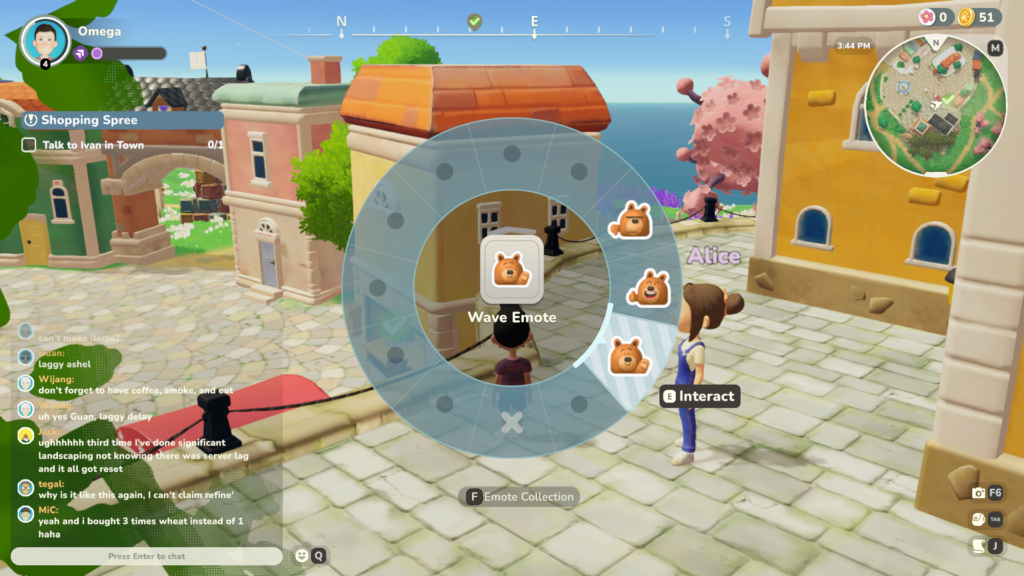
Quest: Shopping Spree
This quest will introduce you to Ivan. He is the only NPC that will sell you basic needs. Unfortunately he, nor any other NPC, is not able to buy anything from you.
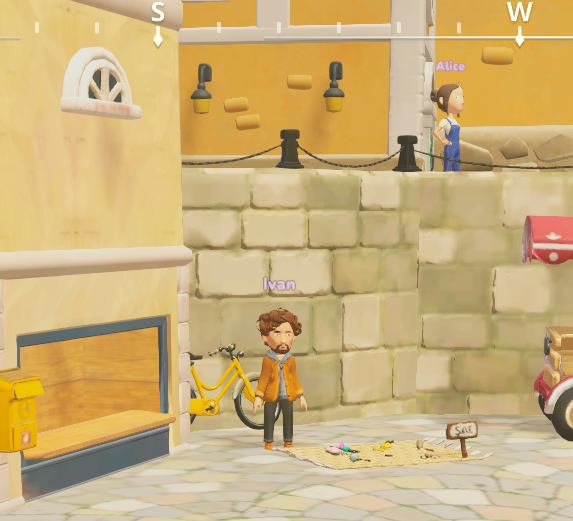
Alice will ask you to speak to Ivan to buy a flute from him. He is located just below the City Hall.
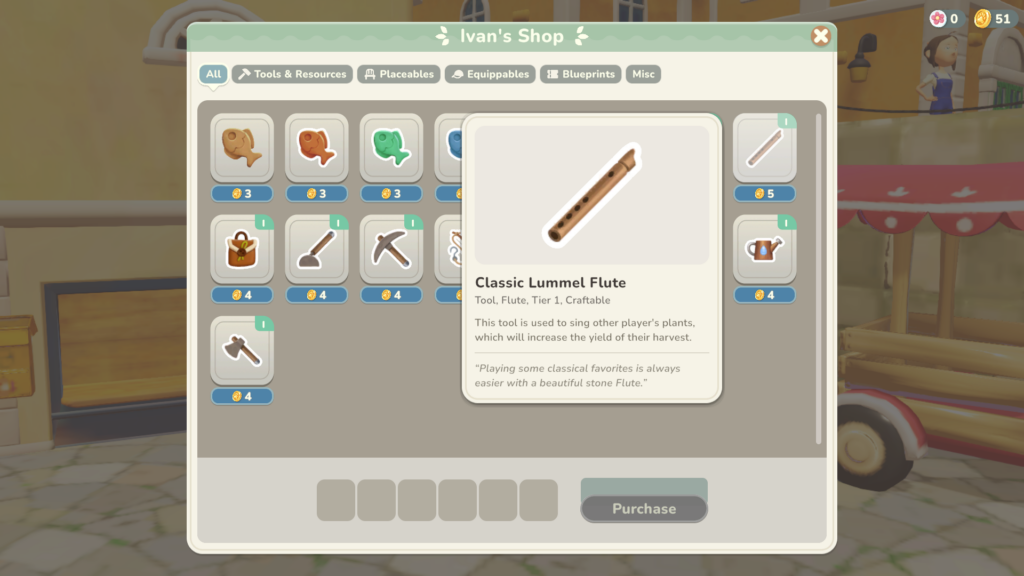
Talk to Ivan to complete the first part of the quest. Press E to shop with him (shopping cart symbol) and listen him talk for one more screen. Select the Classic Lummel Flute from his shop and then click Purchase.
Return to Alice to complete question. She is just up the stairs from Ivan.
Using the Flute
Fluting is used in the game to enhance the yield of crops. You cannot flute your own garden, but your neighbors can come to your land and flute yours.
The flute covers a 5×5 area and you can flute up to 5 times per day but only once per neighbor.
Quest: Ready to Refine
Alice will ask you to return to your plot. Press M to bring up the map and select your land which is located at the top of the list under My Lands.
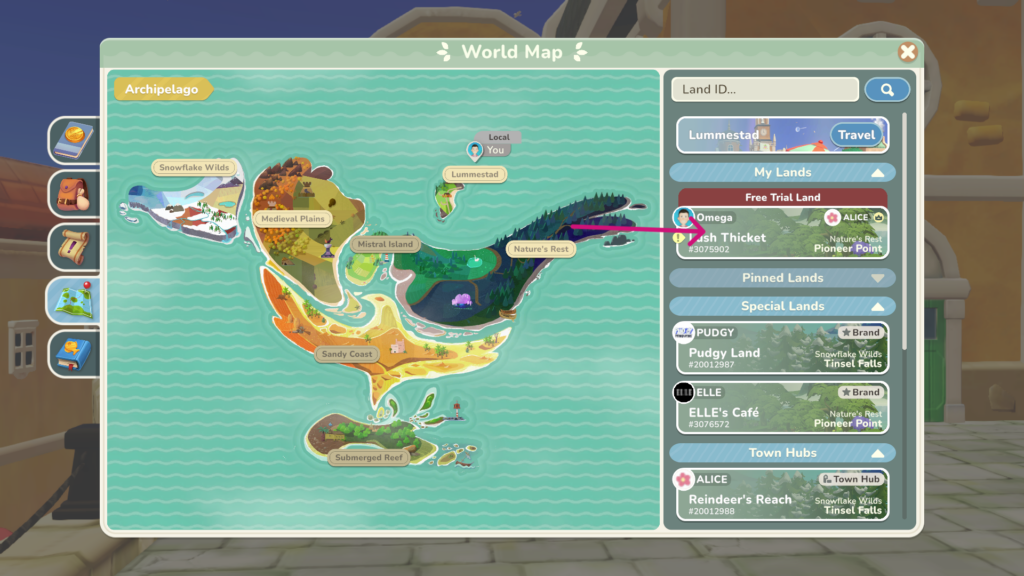
When selected, you will get the following screen.
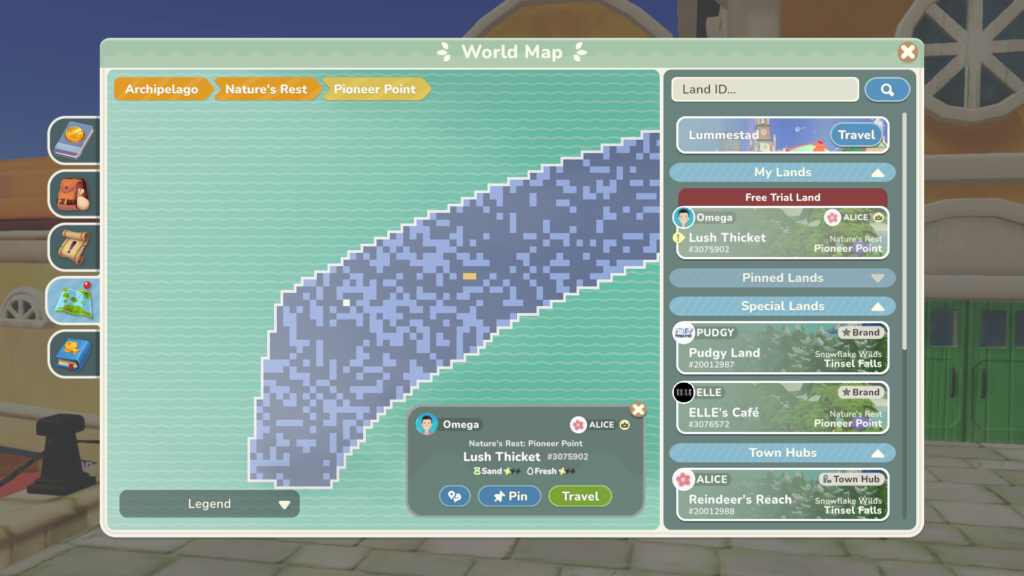
Selecting your land and pressing the green Travel button will take you back home.
The Pin button will add any land to your list of Pinned Lands. This is a great way to visit other neighbors you’ve met.
The chat bubble to left of the Pin button will link the land to general chat. This is used when requesting fluting to other players. By putting in chat, players can click on the link you provided and travel faster. Try it out!
Once you’ve travelled back to your land, speak to Alice.
Quest: Bricks to Begin With
Alice will ask you to craft a refinery and show it to her. Don’t place it on your land before you showed it to her.
Head over to your crafting table, select Refinery and craft it. It will require 10 copper ore, 10 common stone, 10 island silt, and the ticket to build it. Once you crafted it, show it to Alice.
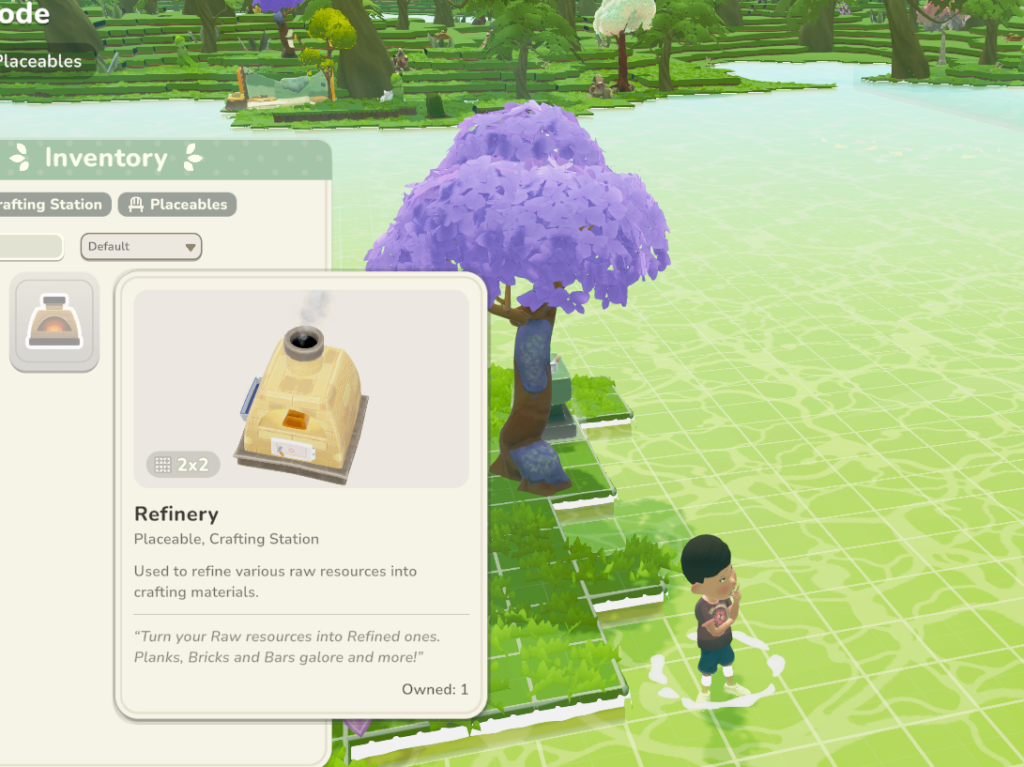
If you made the mistake of placing it on your land first, you can remove it and put it back after you’ve completed the quest. Press B while on your land, find and click on the refinery, then press F to return it to your inventory. Go talk to Alice and complete the quest.
Quest: Sailing Across the Archipelago
Alice asks you to talk to Jose, who should be nearby. Look for green check mark.
When you talk to Jose the above quest will be completed. Talk to Jose again and accept 4 quests for each town hub.
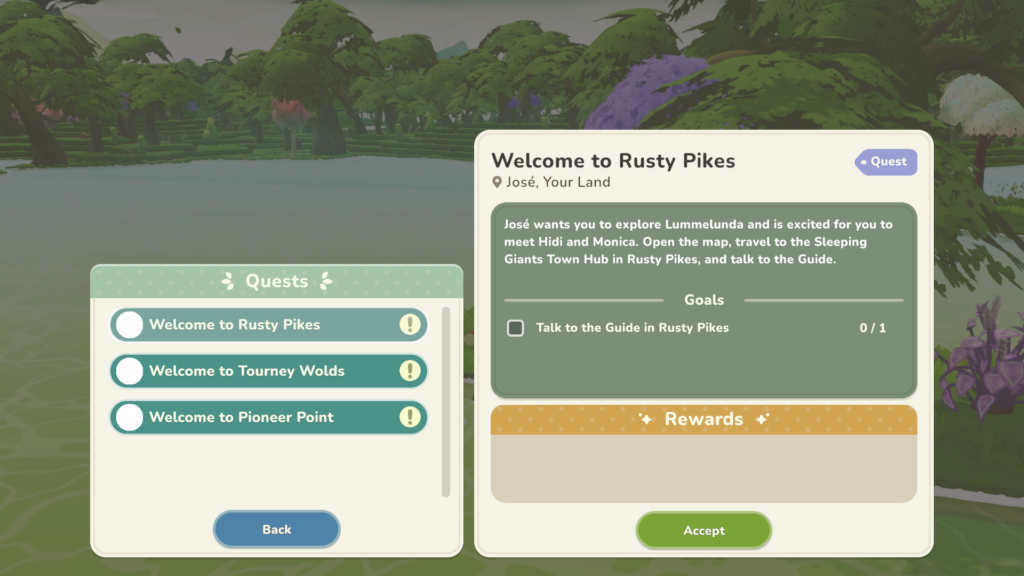
To be able to do other quests, you need to go to each town hub and talk to the guide there. Once you have talked to them, a number of exclamation marks (!) will appear in each town hub, giving you many quests to do.
That’s It
Congratulations. You have finished the first set of tutorial quests and should be well on your way to playing and enjoying the game.
Thank you for visiting us and see you in the game!